

Something not working as expected?
We would really appreciate if you could let us know what the issue is! If you want us to get back to you about it, you can leave your email too.
This script automatically generates links to your Webflow tabs.
Need help with this MemberScript?
All Memberstack customers can ask for assistance in the 2.0 Slack. Please note that these are not official features and support cannot be guaranteed.
V0.2 - Added support for Nested Tabs
It's now possible to link directly to a tab that's nested inside another tab. Simply add a / to your link followed by the tab name (all lowercase).
Example www.yoursite.com#tab-name/sub-tab-name
You can also use this feature to link to multiple tabs. The last tab name mentioned in the link will act as the scroll anchor.
Step 1 → Paste the embed code before the closing </body> tag of any page with tabs.
Step 2 → Use the tab names (found under 'Tab settings") to create your links.
E.g. #closed, #open, #tab-1, etc.
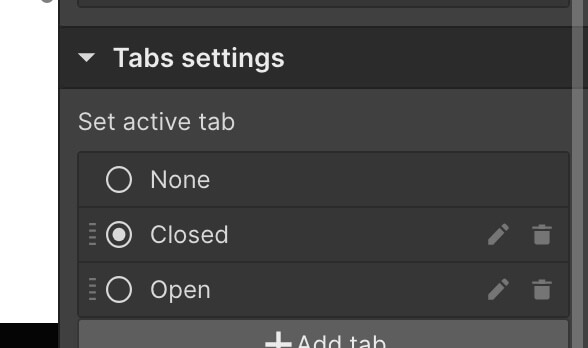
The final link will look something like www.yourdomain.com#tab-1
Creating the Make.com Scenario
1. Download the JSON blueprint below to get stated.
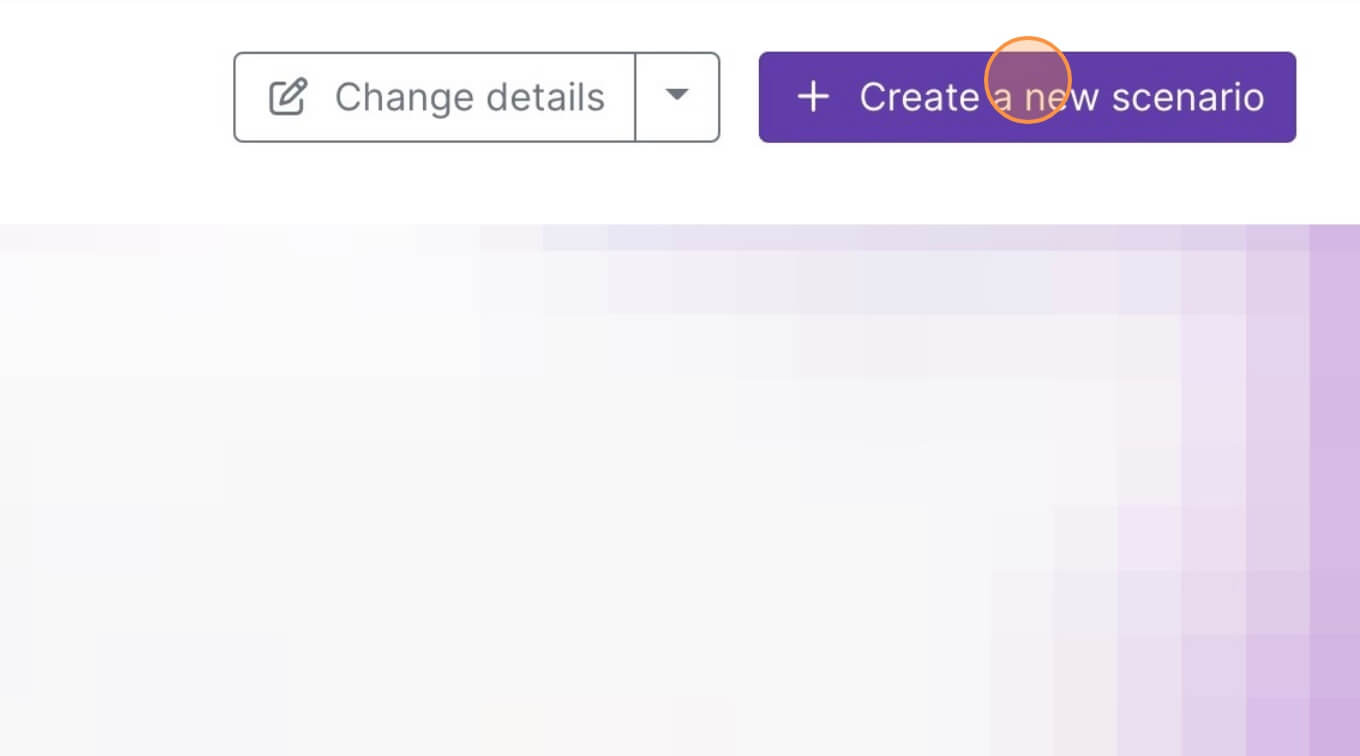
2. Navigate to Make.com and Create a New Scenario...
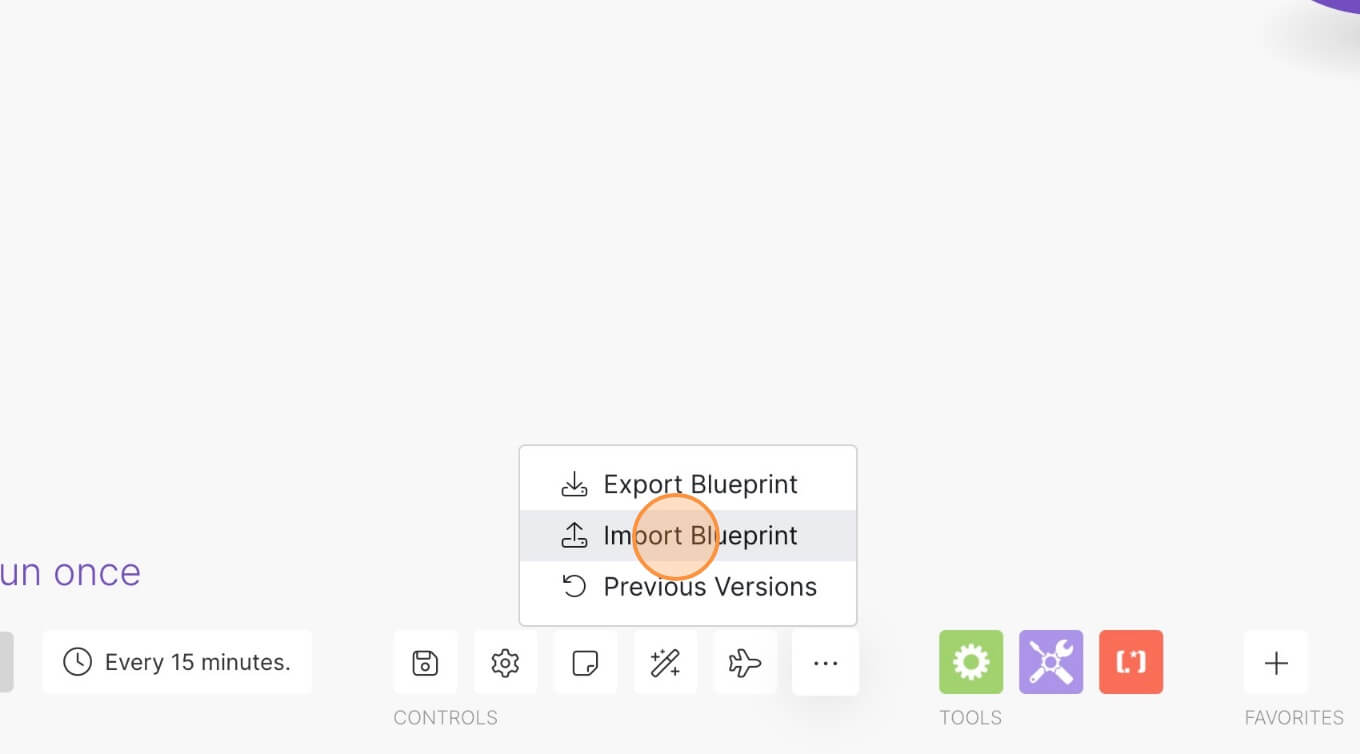
3. Click the small box with 3 dots and then Import Blueprint...
4. Upload your file and voila! You're ready to link your own accounts.
How to Link to a Specific Tab in Webflow
Memberscripts needed
Tutorial
Cloneable
https://simple-tab-link.webflow.io/
https://webflow.com/made-in-webflow/website/simple-tab-link
Why/When would need to Link to a Specific Tab?
- Direct Navigation: Allows users to navigate directly to the most relevant section, improving the overall user experience.
- Efficient Content Organization: Helps in organizing content more effectively, making it easier for users to find what they are looking for without unnecessary scrolling or navigation.
- Enhanced Marketing and Communication: Enables you to link to specific tabs from emails, social media, or other websites, directly leading your audience to targeted information.
How to Link to a Specific Tab in Webflow
Have you ever clicked a link and been brought exact place on the page the link was referring to? If so, you’ll know the relief of not having to scroll to find what you’re looking for. If not, check out this fragment identifier definition to see what we mean.
Fragment identifiers are great for static sites where the element you’re navigating to isn’t hidden. By default, there are challenges using fragment-based navigation to elements that aren’t visible, like non-default Webflow tabs. Your user might land on your site in the right place, but the wrong content will be showing. Fortunately, we have a free MemberScript that you can use to generate links to specific tabs.
Implementing Tab Linking in Webflow
To add this feature, we will use the custom code included with our MemberScript. This script automatically creates links to each tab in your tab components.
Step 1: Setting Up Your Tabs
Ensure your Webflow site has at least one tab component set up. This could be for product details, services, FAQs, or any other content that benefits from tabbed navigation. It’s a good idea to choose appropriate names for the tabs, since their names will display later in the URL when users navigate to them.
Step 2: Generating the Tab Links
Follow the tutorial for Memberscript #31 - Open a Webflow Tab with a Link to add the tab-linking functionality to your Webflow site. It handles all of the link generation and loading logic for you. If you have a fixed height header, you can change the offset in the script to account for it.
3. (Optional) Put It On My Tab!
Make the most of your new tab links by making more targetted funnels, refining on-page navigation, and making more specific references to the information you’re sharing.
Conclusion
Linking directly to specific tabs in Webflow is a simple yet impactful way to improve navigation and content organization on your site. By following these steps and utilizing the Memberstack script, you can create a more intuitive and efficient user experience.
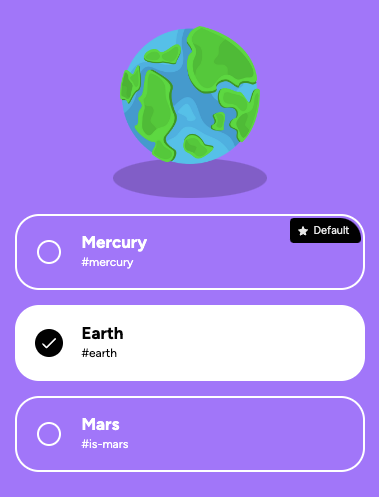
Check out the cloneable shown in MemberScript #31’s tutorial to see tab linking in action! It creates links to tabs containing graphics of different planets.
Take me to the Scripts
https://www.memberstack.com/scripts/31-open-a-webflow-tab-with-a-link


.png)
