

Something not working as expected?
We would really appreciate if you could let us know what the issue is! If you want us to get back to you about it, you can leave your email too.
← All Features
DNS Settings / Custom Domains
DNS Settings / Custom Domains
Enhance user's trust, add an extra layer of security and provide a seamless user experience.
You can integrate your domain in 4 simple steps, ensuring a cohesive and professional online presence.
Copy & Paste Webflow Components


Primary Benefits
Brand Identity
Reinforce your brand identity and contribute to your professional image. Custom Domains make your website address memorable and aligns with your brand name, rather than having the Memberstack.com url. Consistency across your sites helps establish a stronger brand recall and supports marketing and branding efforts.
SEO Optimize
Custom domains are important for SEO. Elements of your domain name play into overall SEO success. These include elements such as memorability, length, keyword usage, brand-ability, and more.
Developer-Friendly
With straightforward steps and clear guidance, our DNS Settings are built to support developers at all skill levels, from beginners to experts.
How to Enable Custom Domains in Webflow
This guide will walk you through the steps to configure custom domains in Memberstack. This process is essential for implementing custom domains for your social auth providers and your single sign-on connections.
Note: You must have any paid plan to use this feature.
If you are having trouble getting your DNS settings to work please make sure you are using your root domain and not a subdomain. This is important even if your app url is using a subdomain.
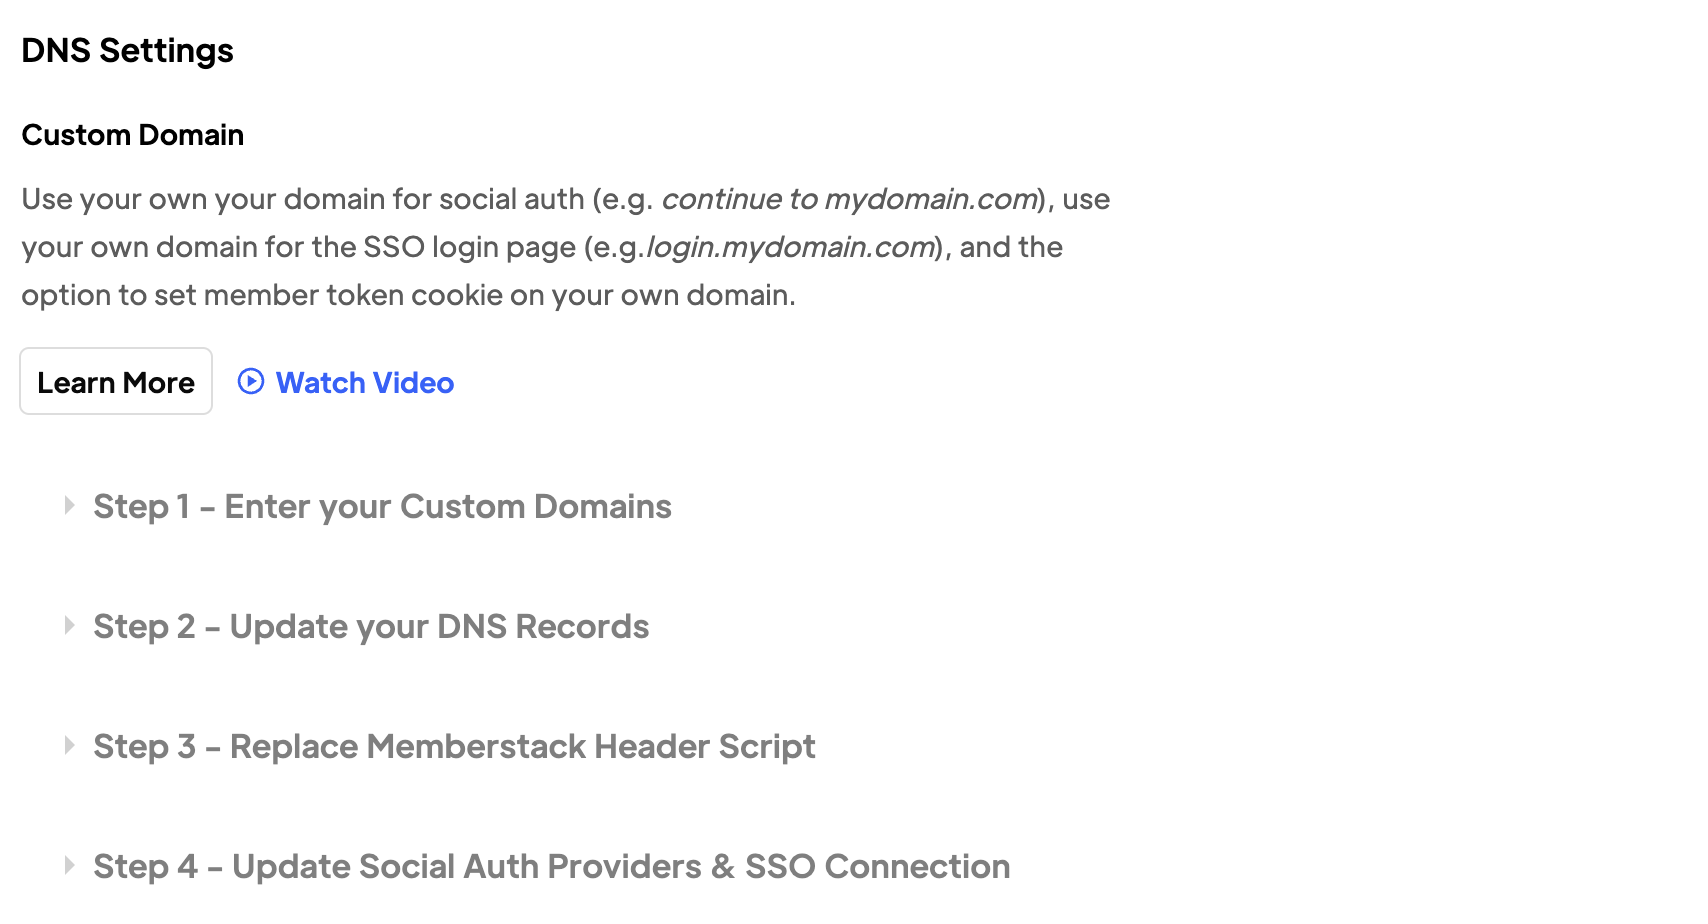
Step 1: Enter Custom Domain
1. Navigate to your Memberstack dashboard.
2. Click on 'Settings' and then 'Application'.
3. Scroll down to 'DNS Settings'.
4. Enter the custom domain you'd like to use in the first input field.
5. In the second input field, enter the subdomain you want to use for the hosted login screen. This applies to the single sign-on process.
6. Click 'Save'.
Step 2: Update DNS Records
1. You need to add a CNAME record for 'memberstack-clients' and point it to 'service-client.memberstack.com'.
2. Add another CNAME record for 'login' and point it to 'service-auth.memberstack.com'.
3. Make sure the proxy is off if your DNS service has one.
Step 3: Update Memberstack Header Script
1. Copy the new header script provided in the DNS settings on Memberstack.
2. Go to your website settings (in this example, Webflow is used) and replace the previous header script with the new one.
3. Save and publish your site.
Step 4: Reconfigure Social Auth Providers and Single Sign-On
1. Navigate to your social auth provider's developer console (Google is used in this example).
2. Go to the 'OAuth consent screen' and click 'Edit App'.
3. Under 'Authorized domains', add your own domain and click 'Save and Continue'.
4. Go to 'Credentials' and click on your 'Client ID'.
5. Add another 'Authorized redirect URI' and delete the previous one. The new URI should be 'memberstack-client.yourdomain.com/auth/callback'.
6. Click 'Save'.
Now, when you navigate to your site and pull up the login screen, you should see your own domain. The single sign-on login screen should also be provided through your own domain.
If you have any questions or run into any issues, feel free to reach out to our customer support team.
Our custom domains are powered by SaaS Custom Domains
Similar Features
Cross-Domain Login
Your Members can log in once and then move freely between your different domains that have Memberstack installed, without having to log in again.
Learn morePasswordless Logins
Build a fully custom passwordless signup and login form for your members. Give them the option to login with a password, magic link, social provider, and more!
Learn moreConcurrent Logins
You decide if members are able to share login credentials or log into the same account on multiple devices. You can turn this setting on or off with a single toggle.
Learn moreEmail Verification
Require members to verify their email address during signup and/or prompt them to verify their email after signup.
Learn moreLinkedIn Login
Allow your members to sign up & login into your web app with their LinkedIn account.
Learn moreGithub Login
Allow your members to sign up & login into your web app with their Github account.
Learn more

.png)
