

Robert Jett
How I Knew When to Stop Designing My Productized Service Business (and Start Selling!)
The hard part about designing a website is not the designing part itself. It’s realizing that, after a certain point, you need to be satisfied with something being “good enough” and start talking to customers. This is part four of a blog series where I build a productized service business with Memberstack and Webflow.
You can follow these links to check out parts one, two, and three.
Major Updates
As has been the case in each of the previous steps, the process of setting up this site has forced refinement in the kind of productized services I want to offer and the things that I believe I can sell to other people.
In the last blog, I settled on AI-powered automation for specific Make-Integrateable tools as my focus for this initial period. This is still the plan – although some work I’ve done (which I’ll explain at the end of this blog) has narrowed my focus tools even more. I don’t think I’m going to spend any more time trying to carve out a better niche until I start talking to customers. I think putting this restriction in place is part of a larger shift I need to start making in this project.
Simple Now, Powerful Later
When I first pitched this series to Memberstack, the content manager at Memberstack gave me some very helpful feedback on the blogs I’d pitched to her – “make it simple now, and powerful later”. In projects like this, it’s easy to imagine highly complex products that do everything that the successful versions of what you're trying to build do.
This is not a constructive mindset. The reality is that there will always be an infinite number of one-more-things that can be added to an existing product. Whether it’s a blog series or a company, if you get stuck trying to polish it into something slightly better, you become stuck making minor changes that provide almost nothing to the overall success of what you're trying to make.
That is the major update of this blog. I have to be done with the design process now. Even though there are things that I want to improve on – better copy, better images, more features — it is not useful to do that without first having paying customers.
I bought the Productized Service template to avoid the need for weeks of design work. With the necessary new features (like the Marketplace) built, my focus is now exclusively on Sales and Marketing. I can worry about making a powerful and dazzling website later.
Finishing the Dashboard and Marketplace
After a few weeks in the automation space, it is clear that one of the bigger differentiators for my agency is going to be the dashboard. Successful versions of this model (like Aircody, Axe Automation, and Leftclick) offer the kinds of services I want to offer – but none use a proprietary dashboard to manage them. Because of this, I know that I need to make the dashboard useful and compelling from the start.
Member JSON
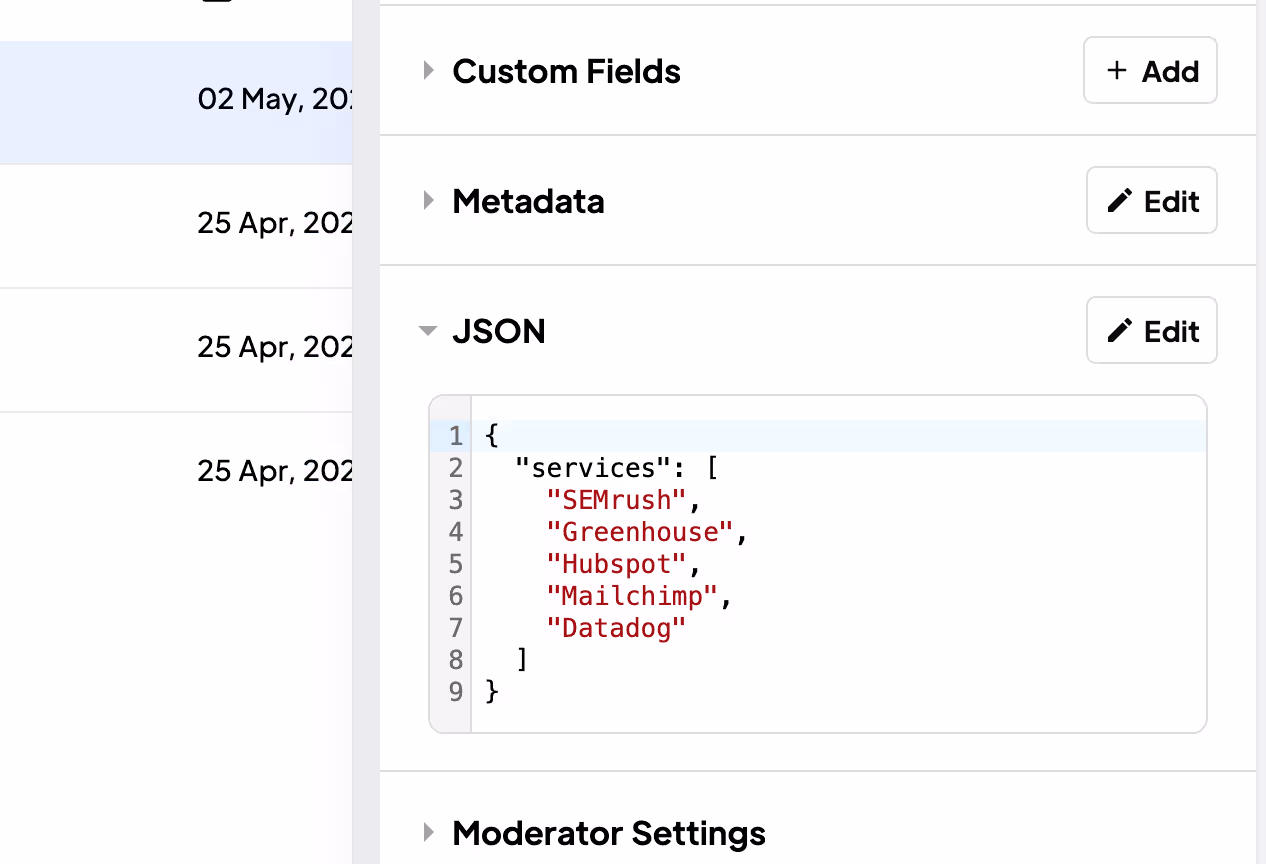
As I mentioned in the last blog, I needed to find ways to integrate more user information into the user dashboard. Specifically, I knew that I needed a way to allow the users to select specific tools they wanted me to integrate into their workflows. The easiest way I found to do this was by using Member JSON in Memberstack.
You can read more about it here, but it allows me to add (or remove) specific information to a user-specific field on my Memberstack Dashboard – stored as a JSON object. This is an especially powerful solution because it can be easily adapted to new features in the future (and the kind of JSON data between users does not need to be identical).
Memberscripts and ChatGPT
The most exciting part about this project has been expanding my understanding of the no-code and low-code development space. I’ve been writing for Memberstack for years, but never really appreciated just how many tools they’ve developed in this space.
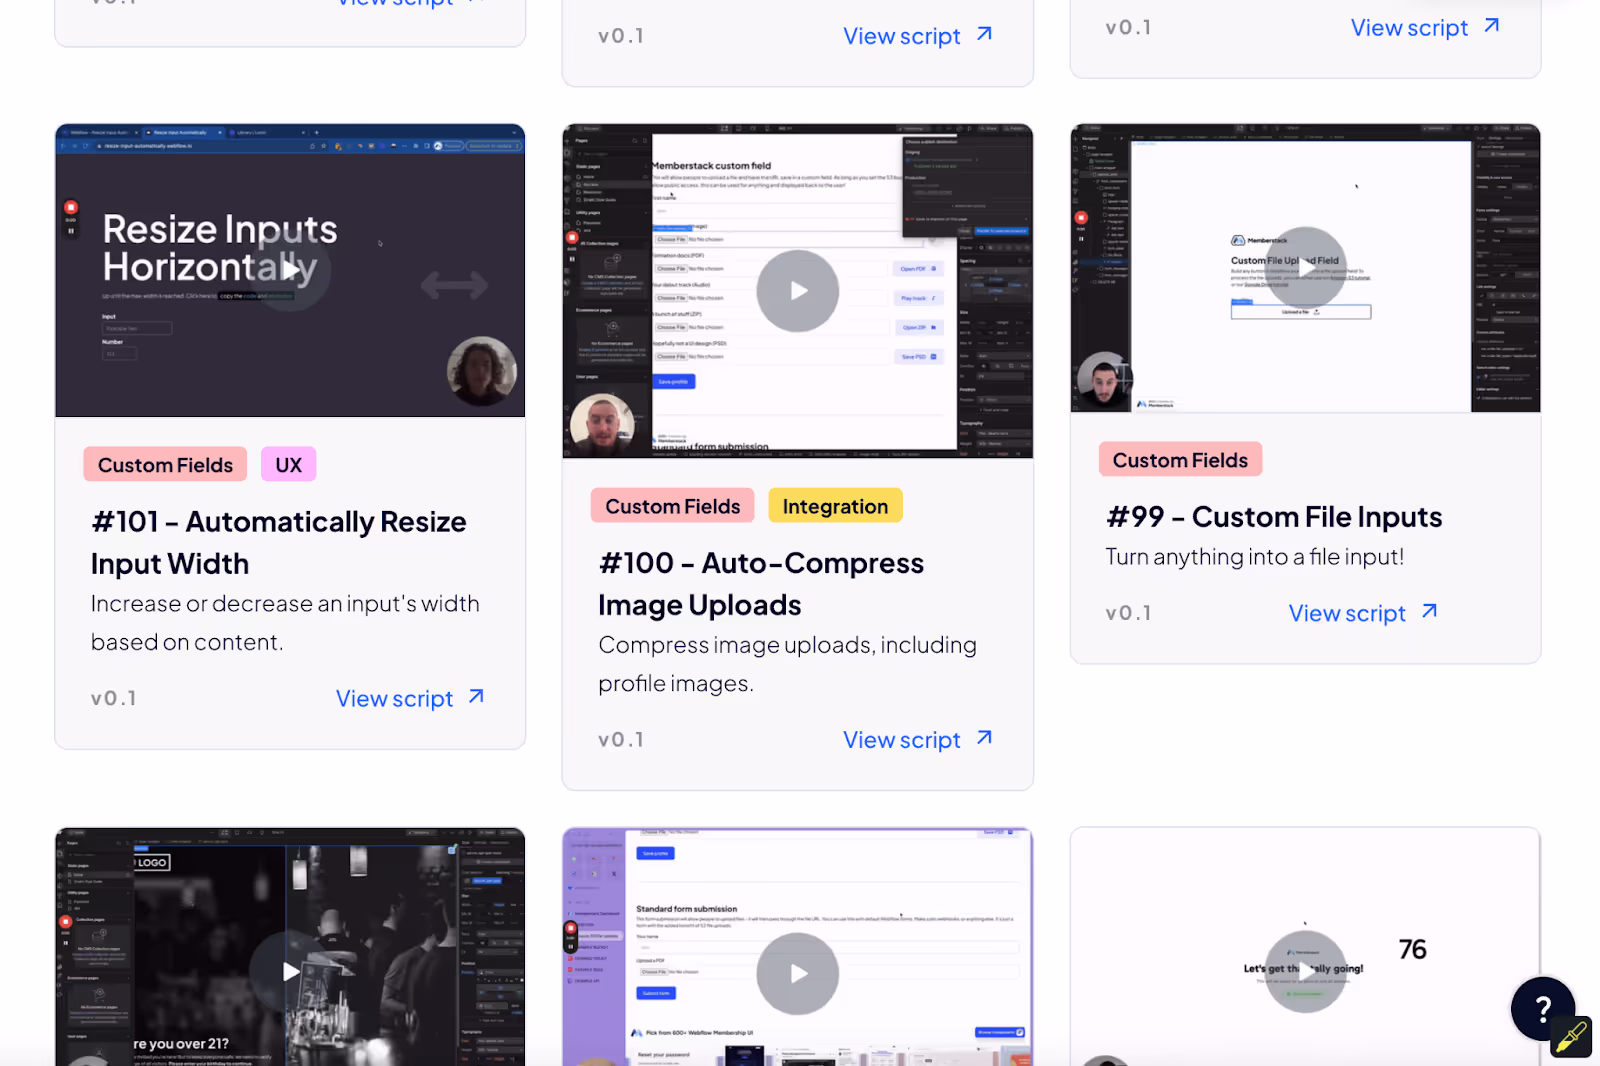
An especially potent example of this is Memberscripts. The walkthrough videos briefly outlined the scripts already on the site – but I found more than 100 scripts that can be pasted in the custom code to do things like writing to Member JSON (in my case) or adding confetti on a form submit. They usually require one or two custom attributes on a target element without additional modifications.
My secret weapon for this project, however, was Memberscripts + ChatGPT. Some Memberscripts were close to, but not exactly, what I needed. However, I learned to feed a Memberscript that does something similar to what I wanted to accomplish, an explanation of what I’m looking for, and maybe a relevant page in the Memberstack 2.0 Documentation into ChatGPT. Using this strategy, I was able to build things that I think would be genuinely difficult for even a seasoned web developer.
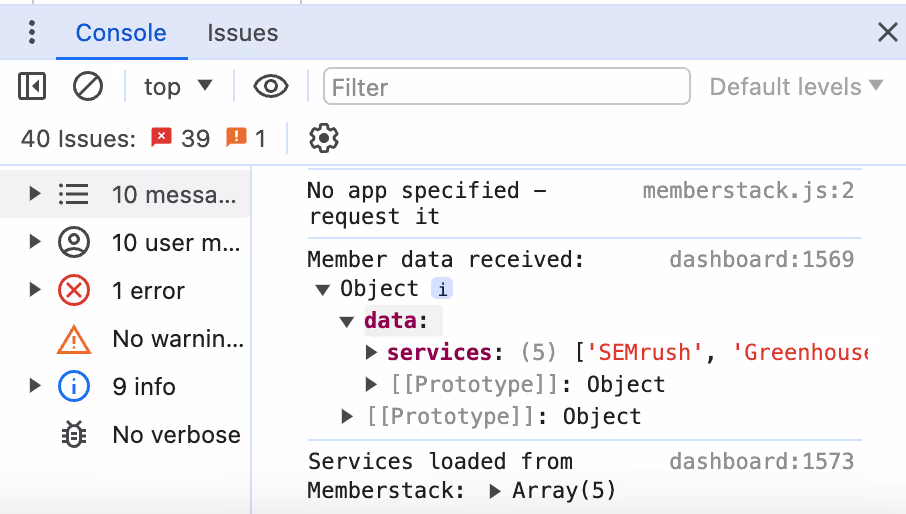
I recommend that you prompt ChatGPT to include as many explanatory comments in the code as possible and don’t be afraid to CODE[console.log] when trying to troubleshoot. Over time, I got a better understanding of how everything fit together.
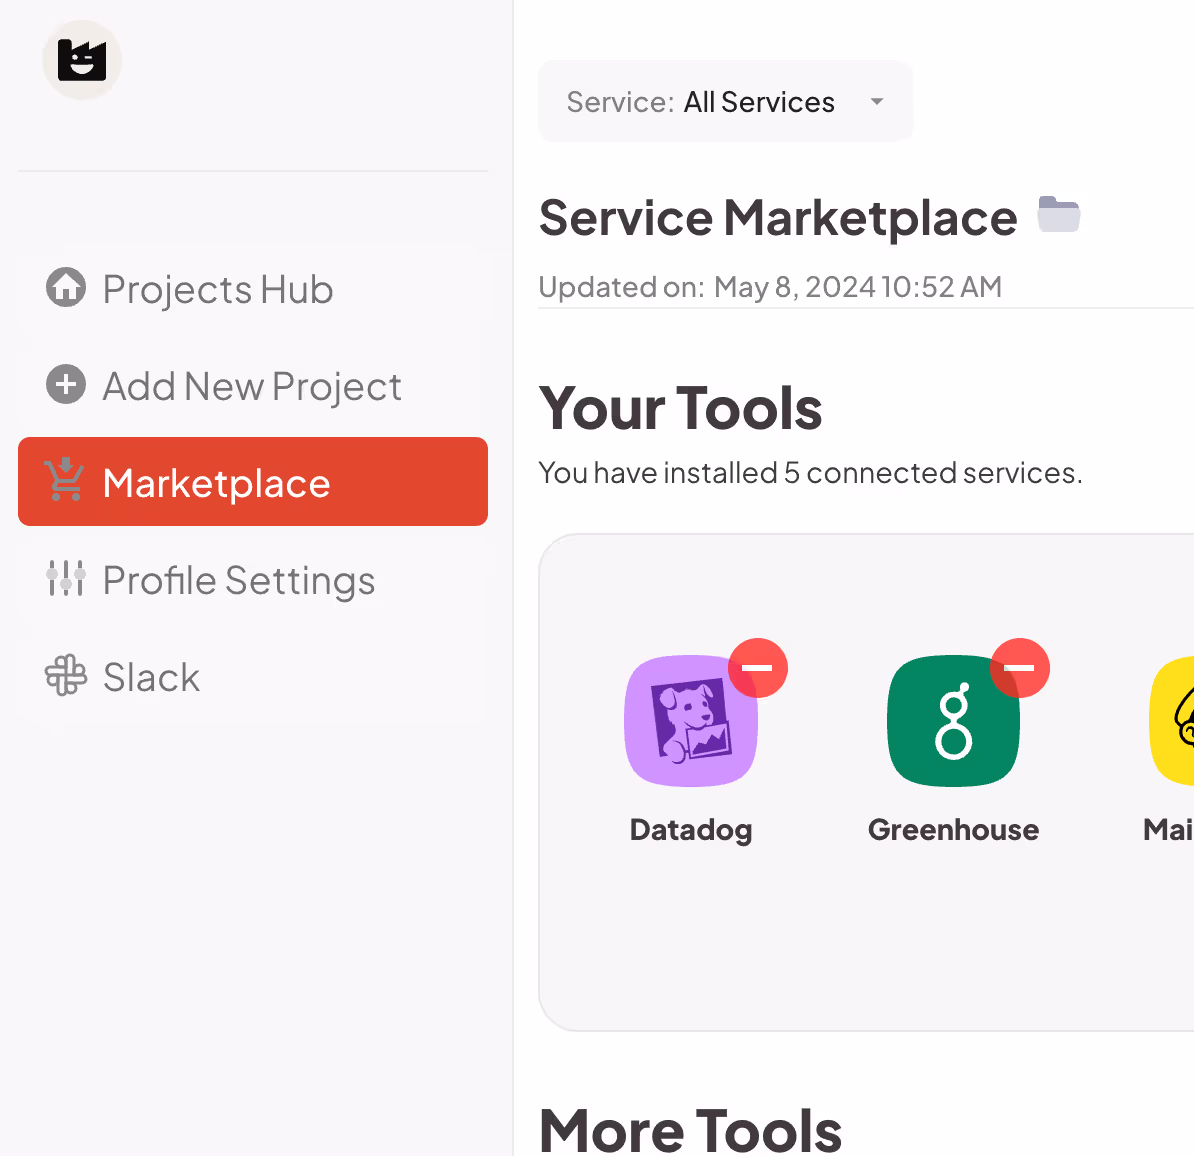
The Marketplace
Equipped with Member JSON and Memberstack, I could start building the “Marketplace” feature on my site.
Here was my general goal for this:
- Provide a list of tools.
- Allow users to select which tools they want to add to their account.
- Display selected tools.
- Allow selected tools to be displayed in the “Add New Projects” menu.
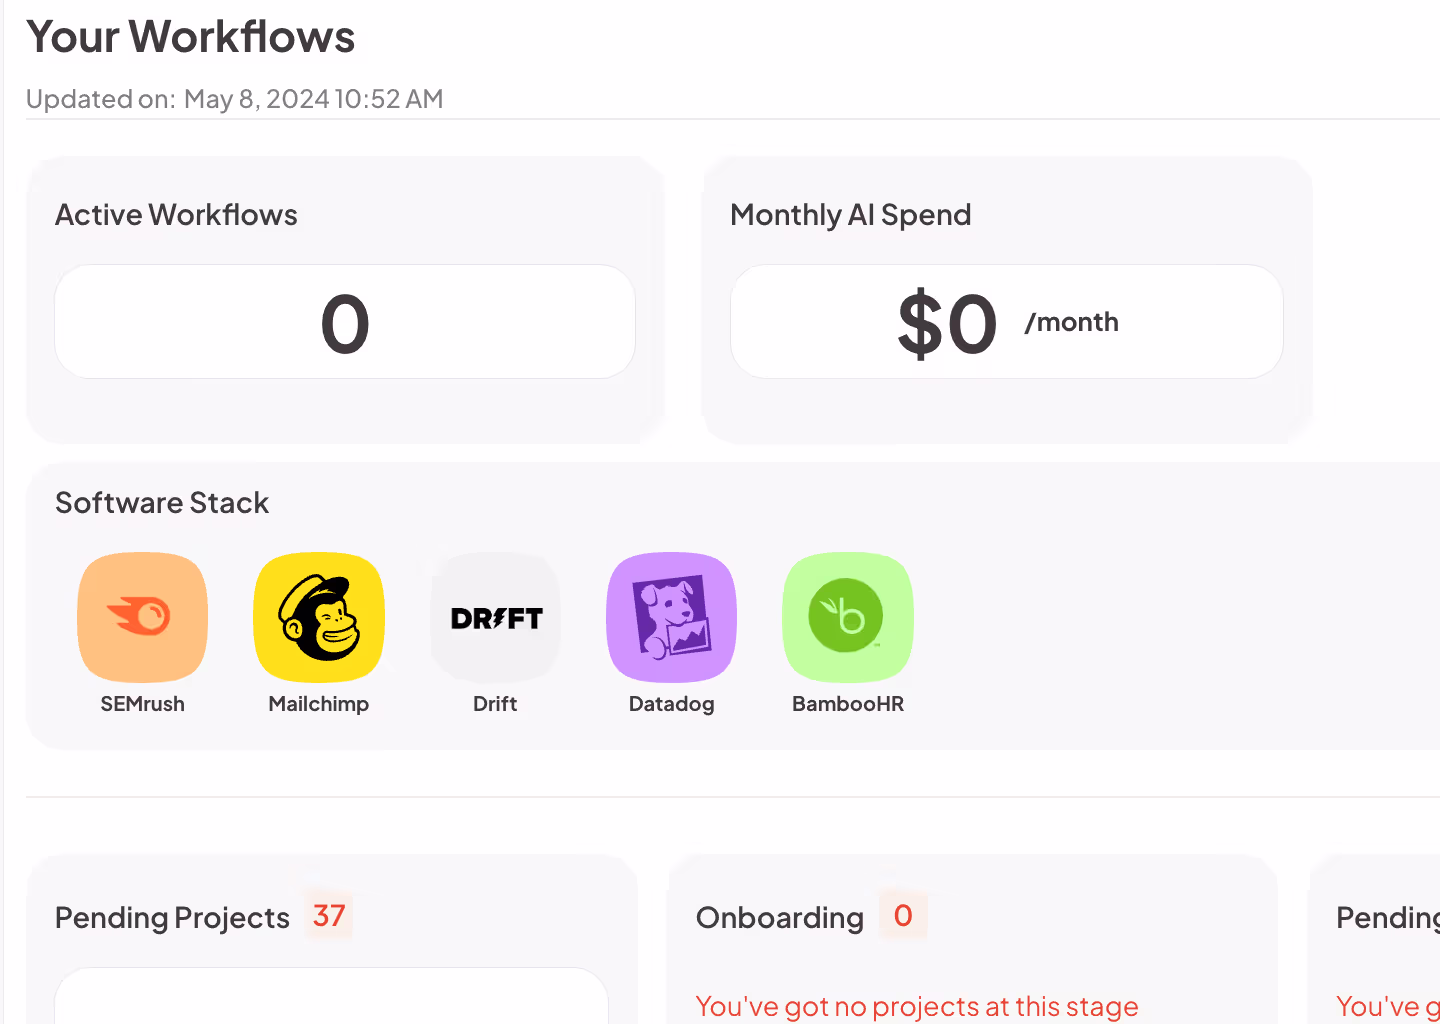
- Show selected tools on the dashboard home.
To create the general Marketplace page, I cloned another page in the dashboard (so that it would carry over the same sidebar formatting) and added a new tab and CSV icon.
Then I created a new CMS collection, with the initial CMS items populated via a Make scenario from my research Airtable sheet. The columns in Airtable (and in the CMS) were decided through a bit of trial and error (based on what I needed to show across my site).
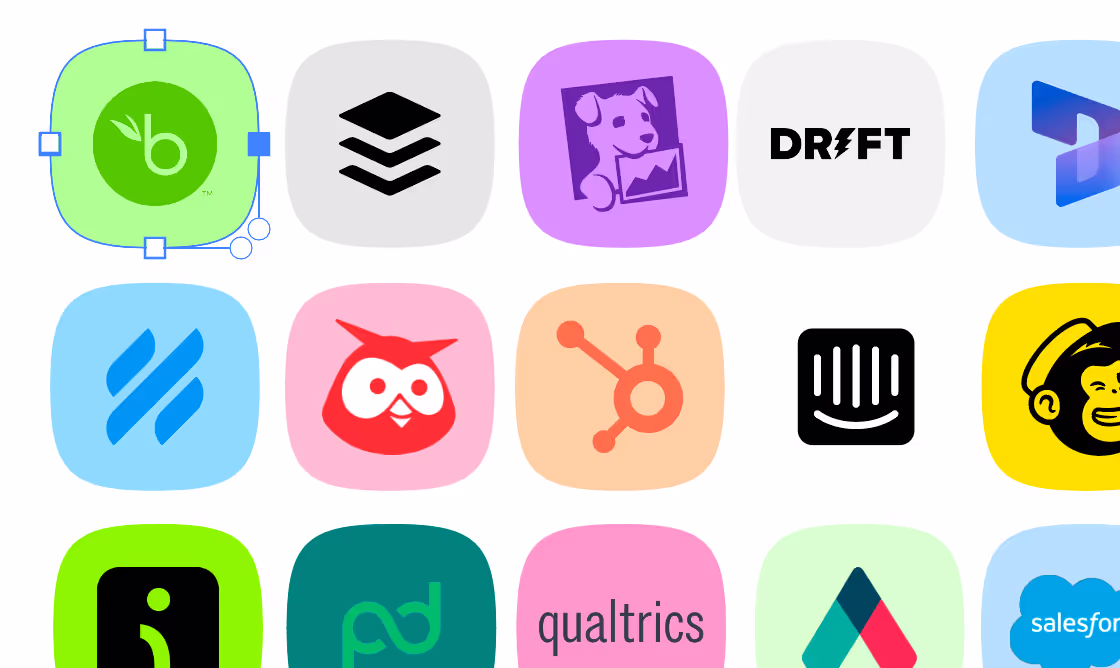
I created some icon images in Adobe Illustrator with a PNG (or SVG) image of each software’s logo on top of a squircle (I just liked how this looked).
Finally, the hard part. After some experimentation, I realized the process I needed to implement in the code was:
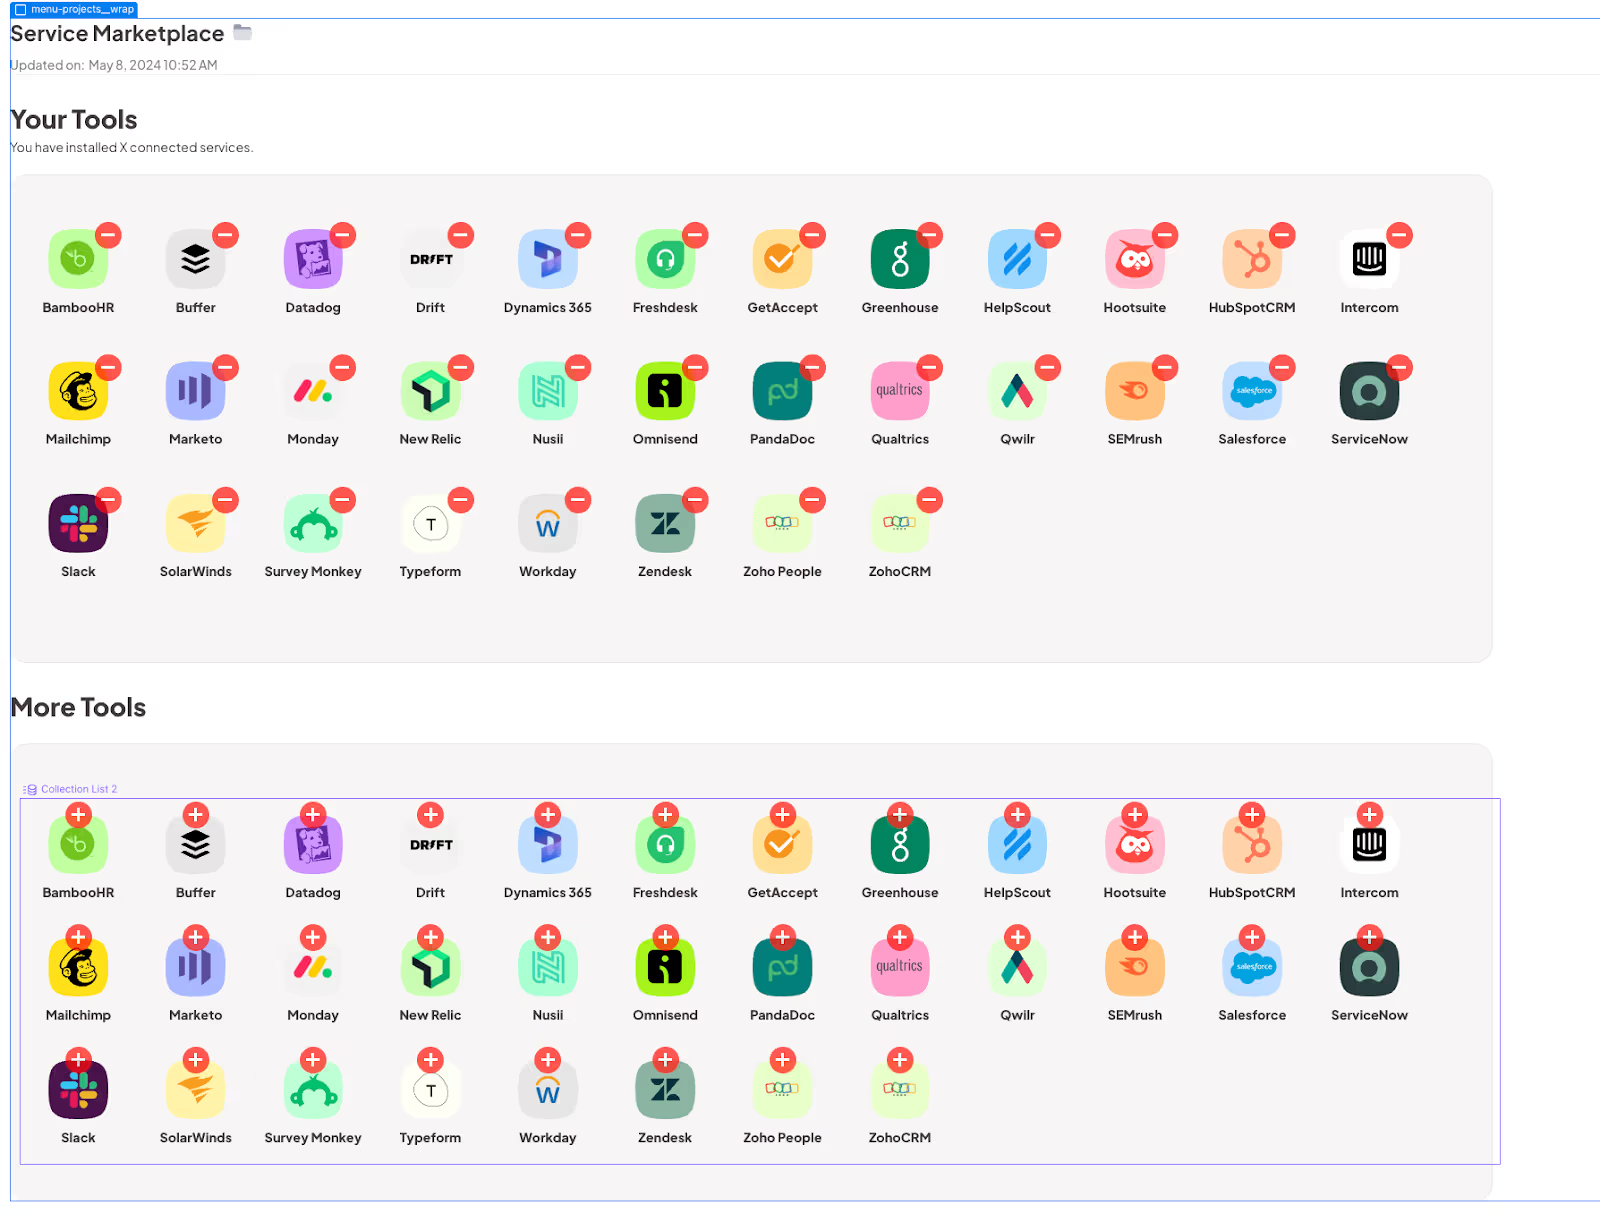
- Create two CMS item lists. The first would display all currently added tools, and the second would display all non-added tools.
- Add a button to each CMS item which would add (in the second list) or remove (in the first list) the name of each to a JSON array called “services” (which refers to the name of the tool being added).
- Filter the first list to remove tools that are not included in the JSON array.
- Filter the second list to remove any tools that ARE included in the JSON array.
There were some Memberscripts that accomplished similar things to this (specifically #1 – Add Items to Member JSON, #5 – Fill Tex Based on Member JSON, #12 – Add Items to JSON Group on Click, and #20 – Save & Unsave CMS Items) – but with each script I needed to do something slightly different.
I’m simplifying exactly how this happened (this took almost 3 days of ChatGPT experimentation), but I assigned each CMS collection item element two custom attributes: CODE[data-crm=”owned (in the first CMS list)/not-owned (in the second CMS list)”] and CODE[company-name=”{{Name}}”] (with {{Name}} being a dynamic field from the CMS.
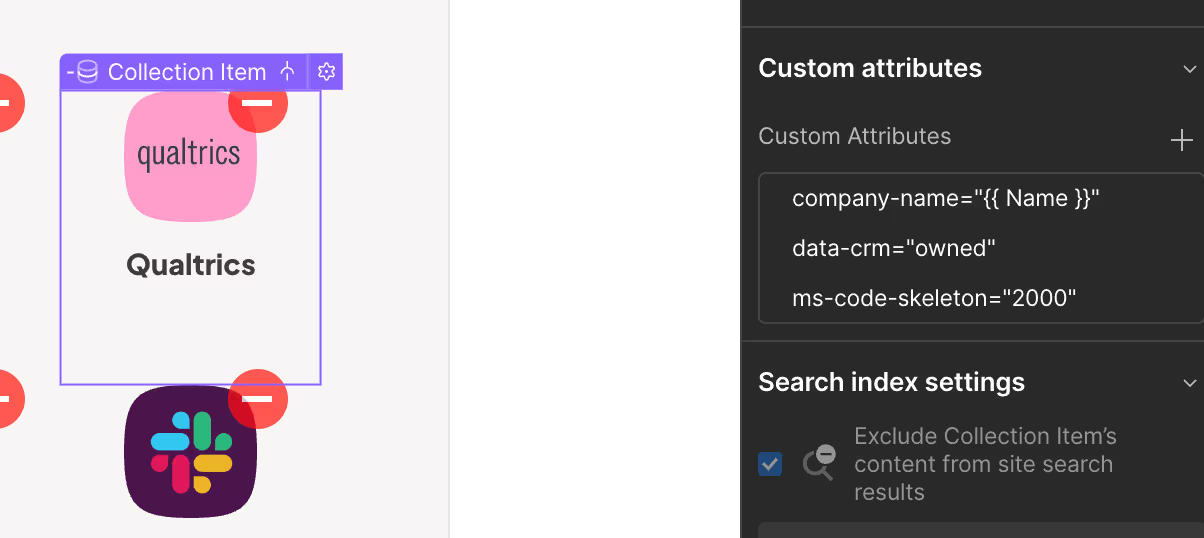
I then created a script that adds new services (based on the {{Name}} in the custom attribute) to an array in Member JSON called “services” when users click a “+” – and which removes it when the user clicks a “-”.
Then I generated another script that filters the two CMS lists. In the one where CODE[data-crm=”owned”], all of the CMS items are hidden, and then unhidden if {{Name}} is in the JSON. In the CODE[data-crm=”not-owned”], it simply hides all CMS items where {{Name}} is in JSON. I also added the skeleton loaders and an auto page reload on click.
Again, this is a simplification, but this allowed me to display two separate lists of added and non-added tools. I reused this code on several pages, including on the homepage (to display owned tools) and on the “Add New Projects” page.
Adding New Projects
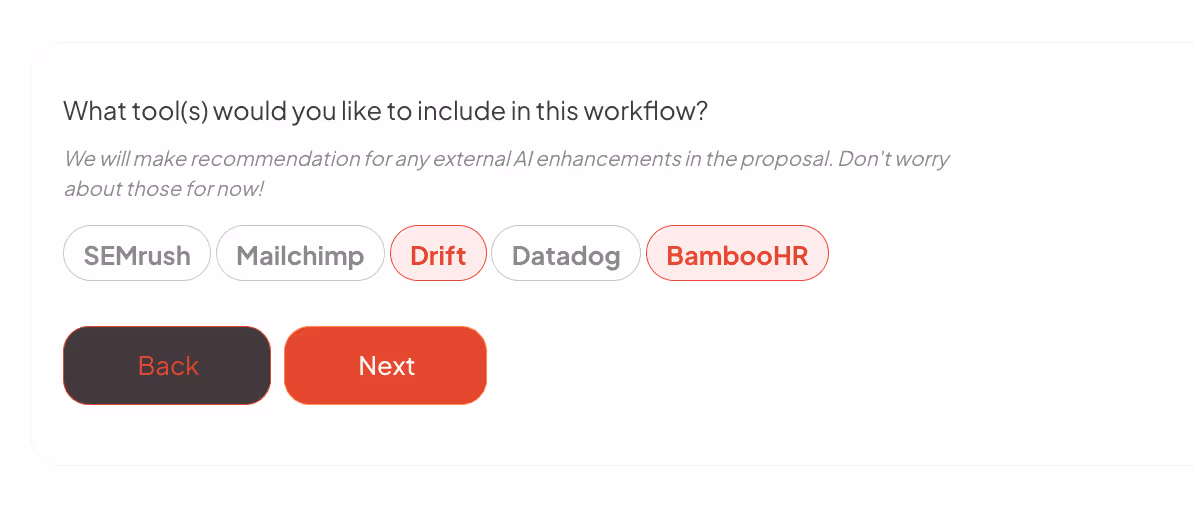
The last thing that needed to be “functional” before I could start reaching out to customers was the process for adding new projects. The existing template worked, except tool selection flow. My requirements were:
- Only show connected tools.
- Allow users to select multiple tools.
1) was more or less solved in the last section. 2) was much more challenging, because the radio field on the existing form only allowed for single selection. I needed to convert it into a checkbox list.
Luckily, Memberstack has a very comprehensive (and free!) Ultimate Webflow Forms UI Kit. I came across this organically online and was humorously surprised to see it was from Memberstack. I used the “Checkbox Pill Buttons” field from that template.
Checkboxes can’t be passed with values into a Make webhook (checkboxes only pass through True or False values). Fixing this took a lot of trial and error with ChatGPT, but I eventually added some code to hijack the webhook trigger and send the {{Name}} data directly as a comma-separated list. However, this did break the final summary screen – so I just deleted it.
This is a much prettier explanation of the dashboard development process. Truthfully, a lot of this newly added code is messy. I’ll fix it later, but it does more or less exactly what I need it to do for now.
Pricing
And finally, pricing! These were very easy to set up in the Memberstack dashboard. I settled on a three-tier membership model.
The differentiators between each are:
- Number of Integrations
- Number of Workflows
- Turnover Time
The three tiers are:
Trial: $125/month or $1,200/year
This is the cheapest option. I want this to be a proof of concept tier. You get one workflow (per month) with a maximum of 5 connected tools. Turnover is 2-4 days.
Growth: $950/month or $9,120/year
This is the middle option. This is the one I imagine being easiest to sell. It comes with a dedicated success manager and turnover is 1-3 days.
Unlimited: $1750/month or $16,800/year
The highest-end option. Unlimited tools. Unlimited workflow. This is the one I want to sell the most. Turnover is 1-3 days.

I’m certain that I’ll change this eventually, but I ran the numbers in a Google Sheet and these prices get me where I want to be in the short term. Competitors are charging 2-3x more than this. Once I have more customers, I might start charging more.

Next Steps
And we’re done! You can check out the live site at cultureindustry.ai. Now I will be shifting my focus entirely to acquiring customers. I’m planning on doing a combination of in-person sales, cold-emailing, and inbound marketing. I won’t get into that now – so stay tuned for the next blogs.
Most importantly, I cannot spend any more time designing the website until I start talking to customers. There are hundreds of ways I could improve the website, but nothing I do is worthwhile if I’m not being paid to do it.
Conclusion
An update on costs:
Total Cost:
Webflow CMS Site Plan: $29
Memberstack Basic Subscription: $29
Make.com Basic Subscription: $9
Productized Service Template: $56
Adobe Creative Suite: $31
ChatGPT: $20
TOTAL: $174.00
Total Revenue:
TOTAL: $0
This wraps up part one of this blog series. I can’t imagine what it would have taken for me to get to this point without the Productized Service template. Redesigning two pages took almost three days – designing, automating, and coding the entire site would have taken at least a month (which itself would have cost me much more in subscription fees than the price of the template). I’ll see you in the next section, where I’ll tackle the sales and marketing process!
Add memberships to your Webflow project in minutes.
Over 200 free cloneable Webflow components. No sign up needed.
Add memberships to your React project in minutes.
.webp)


.png)
