Used by 50,000 Teams & Agencies
Memberstack is used by millions of people every single day.


_logo_2012.svg.avif)


Primary Benefits
One feature that’s very common, especially with SaaS businesses, is having plans which allow multiple users - this way, people who pay can add other, new members to their account.
This is a start-to-finish guide on adding team accounts to your Memberstack + Webflow site.
Note: This guide assumes you already have created a Memberstack app and connected your Stripe account. If you haven’t started your project yet and don’t know how to, please click here to watch the getting started video.
Step 1: Creating a plan
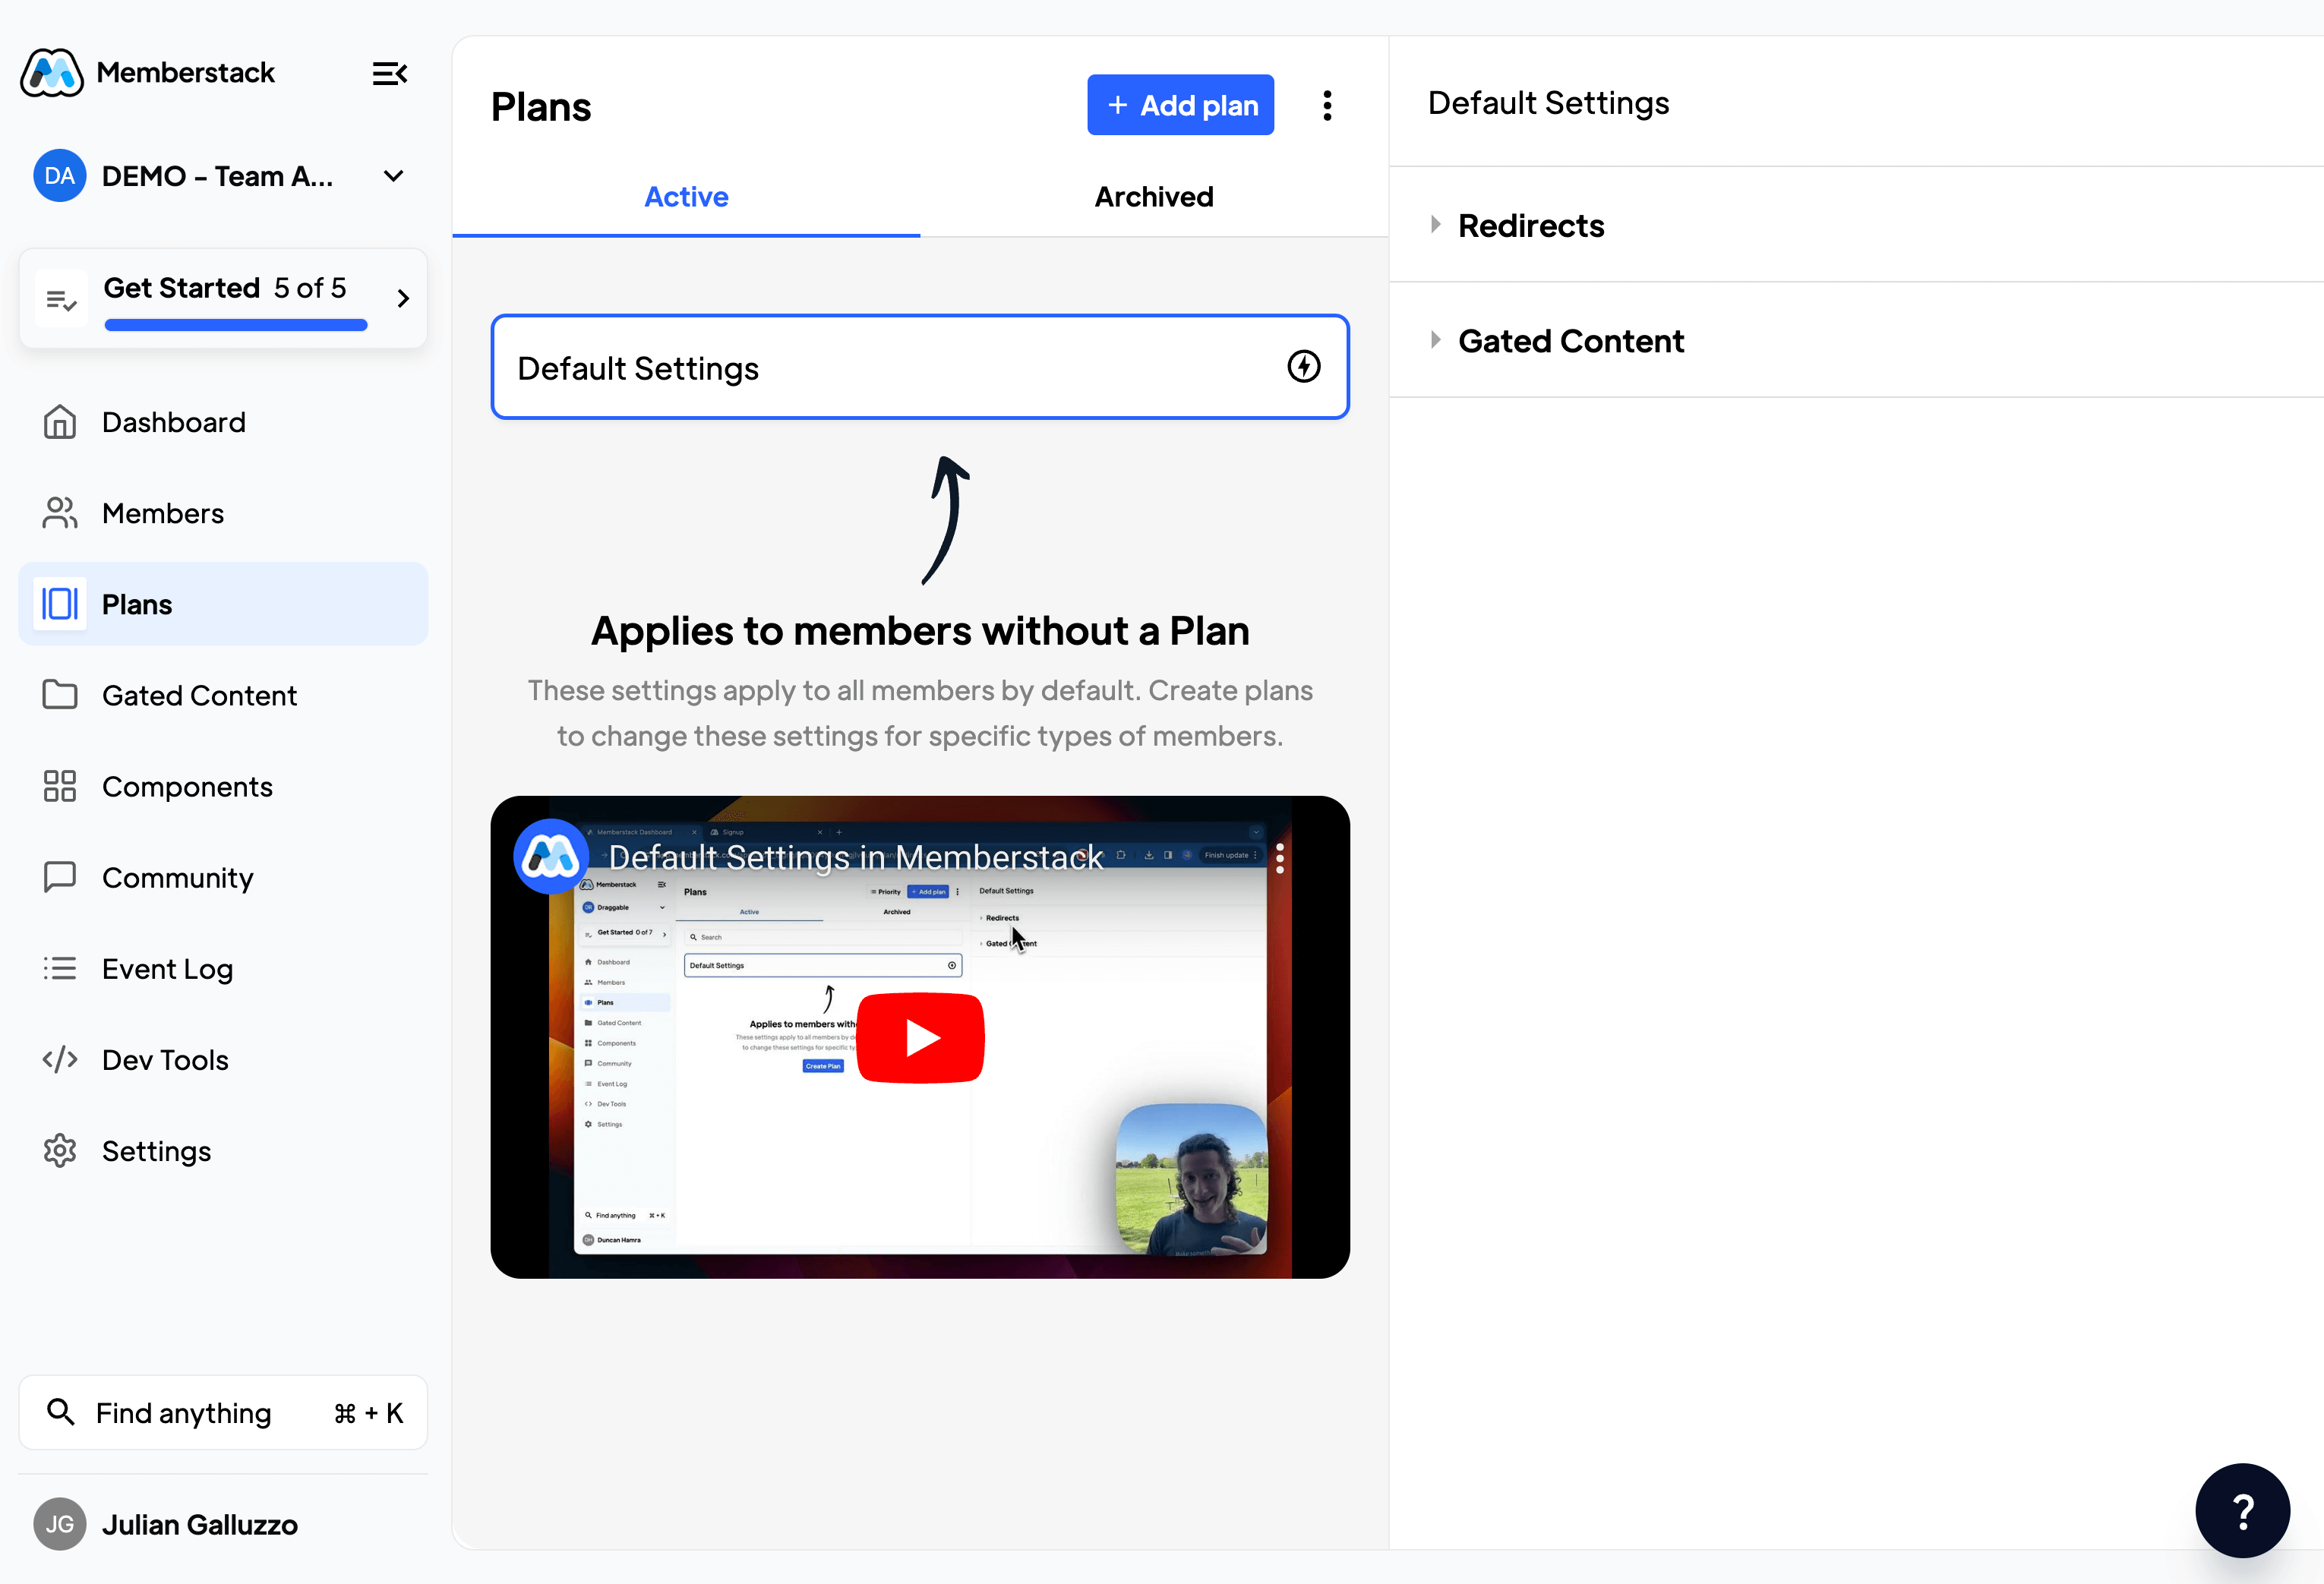
The first thing you’ll need to do is head into the Memberstack dashboard and go to the “Plans” tab on the left-hand side.
Click the “Add plan” button at the top.
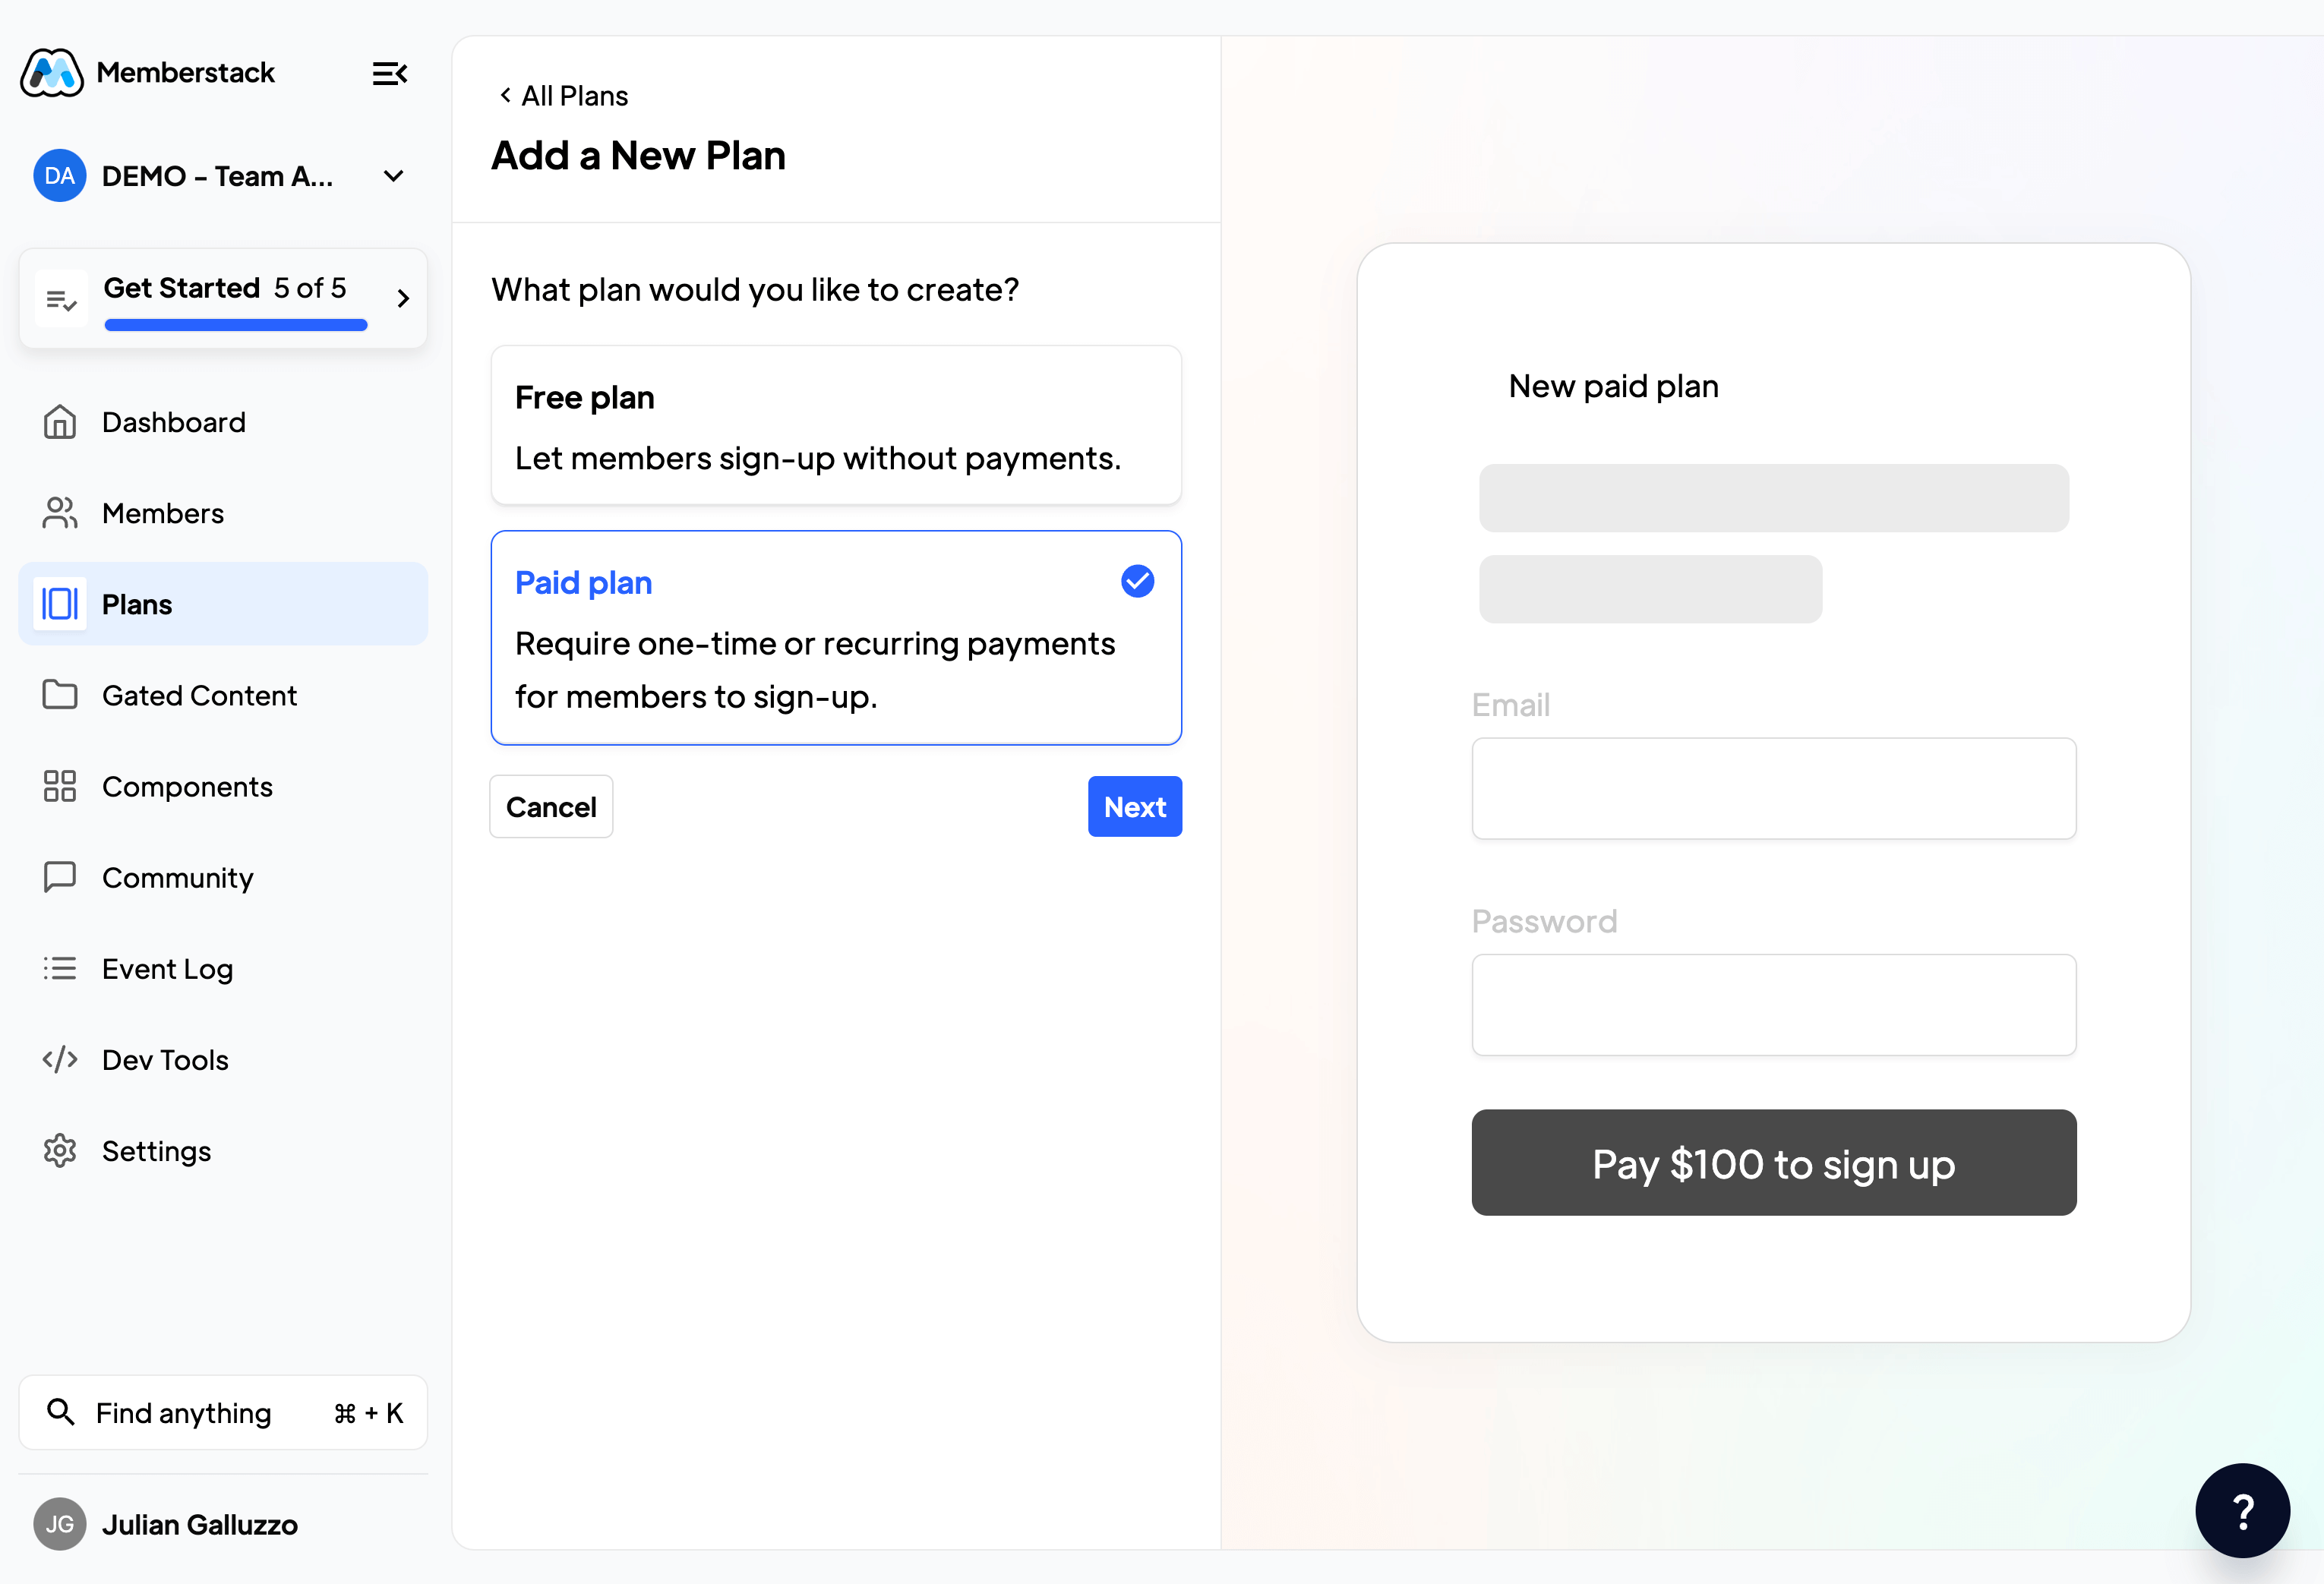
Select “Paid plan”, and click “Next”.
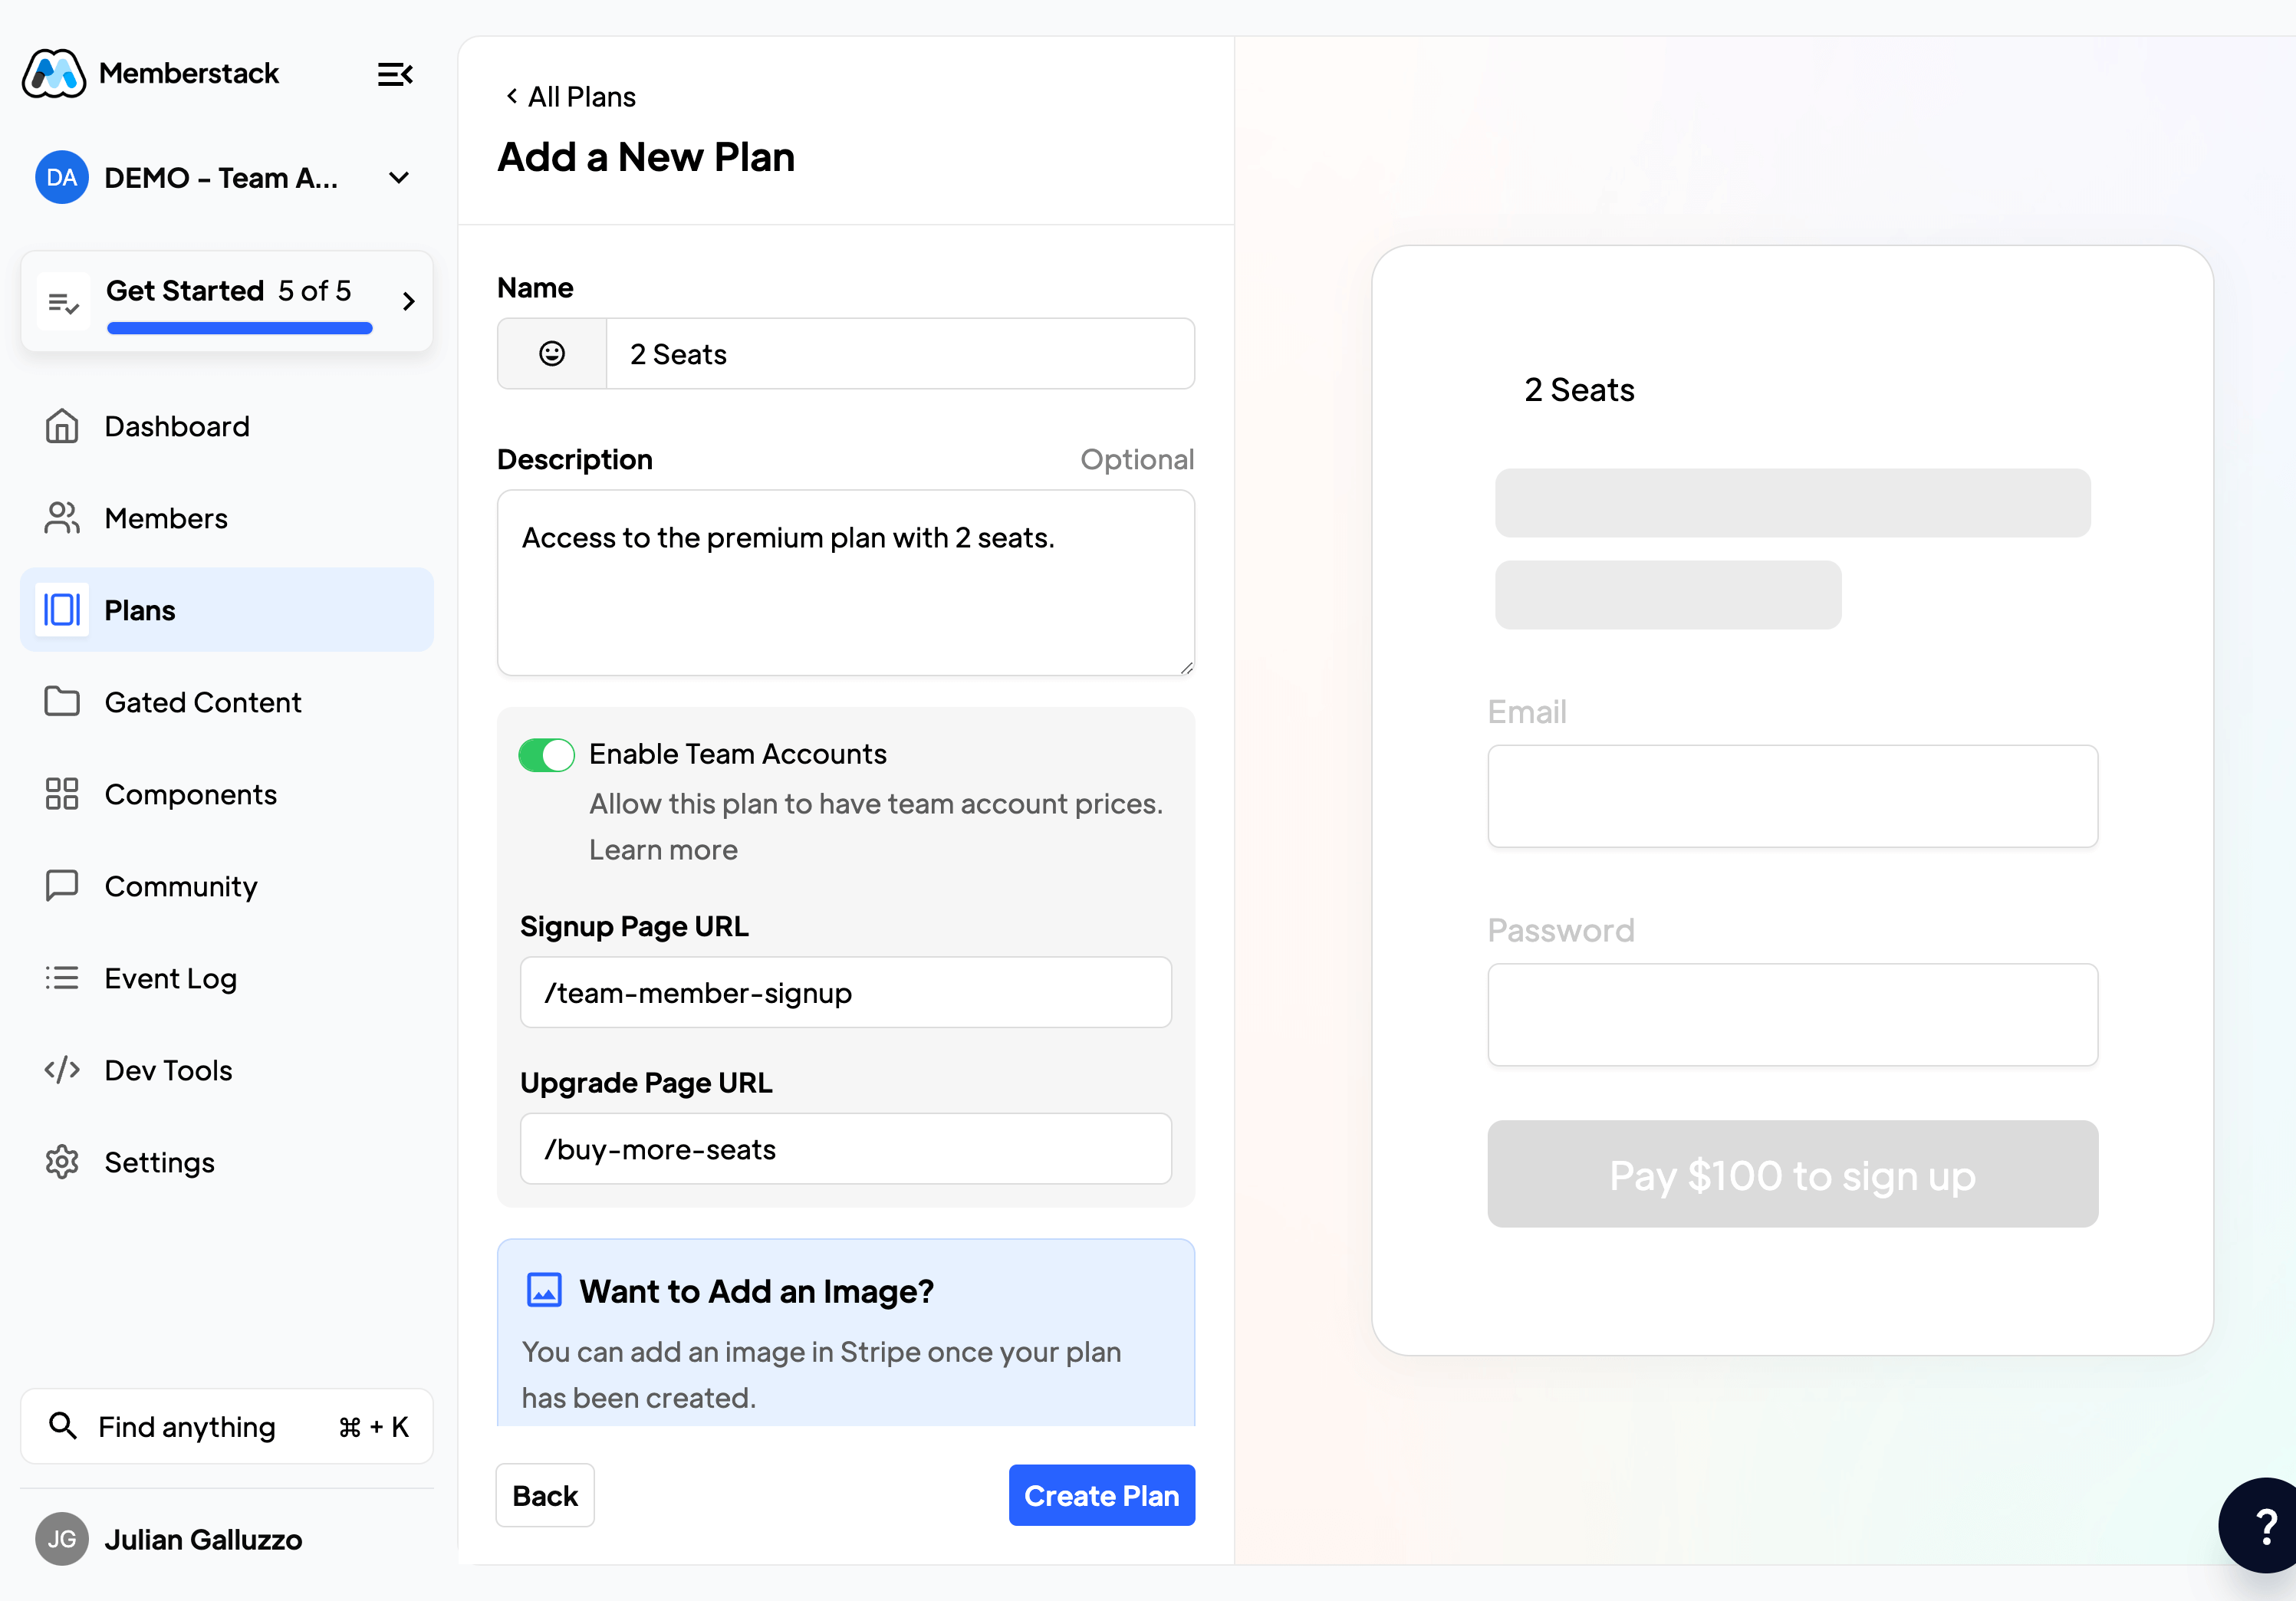
You can give your plan a name and description. For this plan, we’re going to call it “2 Seats”, because you will only be able to create prices which will have a maximum of 2 seats - but, yours will likely be something like “Premium - 2 Seats”. Since customers will see the name of this plan at checkout, make sure it makes sense.
⚠️ You can only have ONE seat count, per-plan. You CANNOT make multiple prices and assign a different maximum seat number to each.
Click the toggle to “Enable Team Accounts”, and 2 more fields will appear;
Signup Page URL: This is the page that the team members will be sent to when they click the invite link - so, you’ll likely want it to say something like “You’ve been invited”
Upgrade Page URL: Once a plan owner has reached the full amount of seats, they will see an option to upgrade. When they click that link, it will take them here.
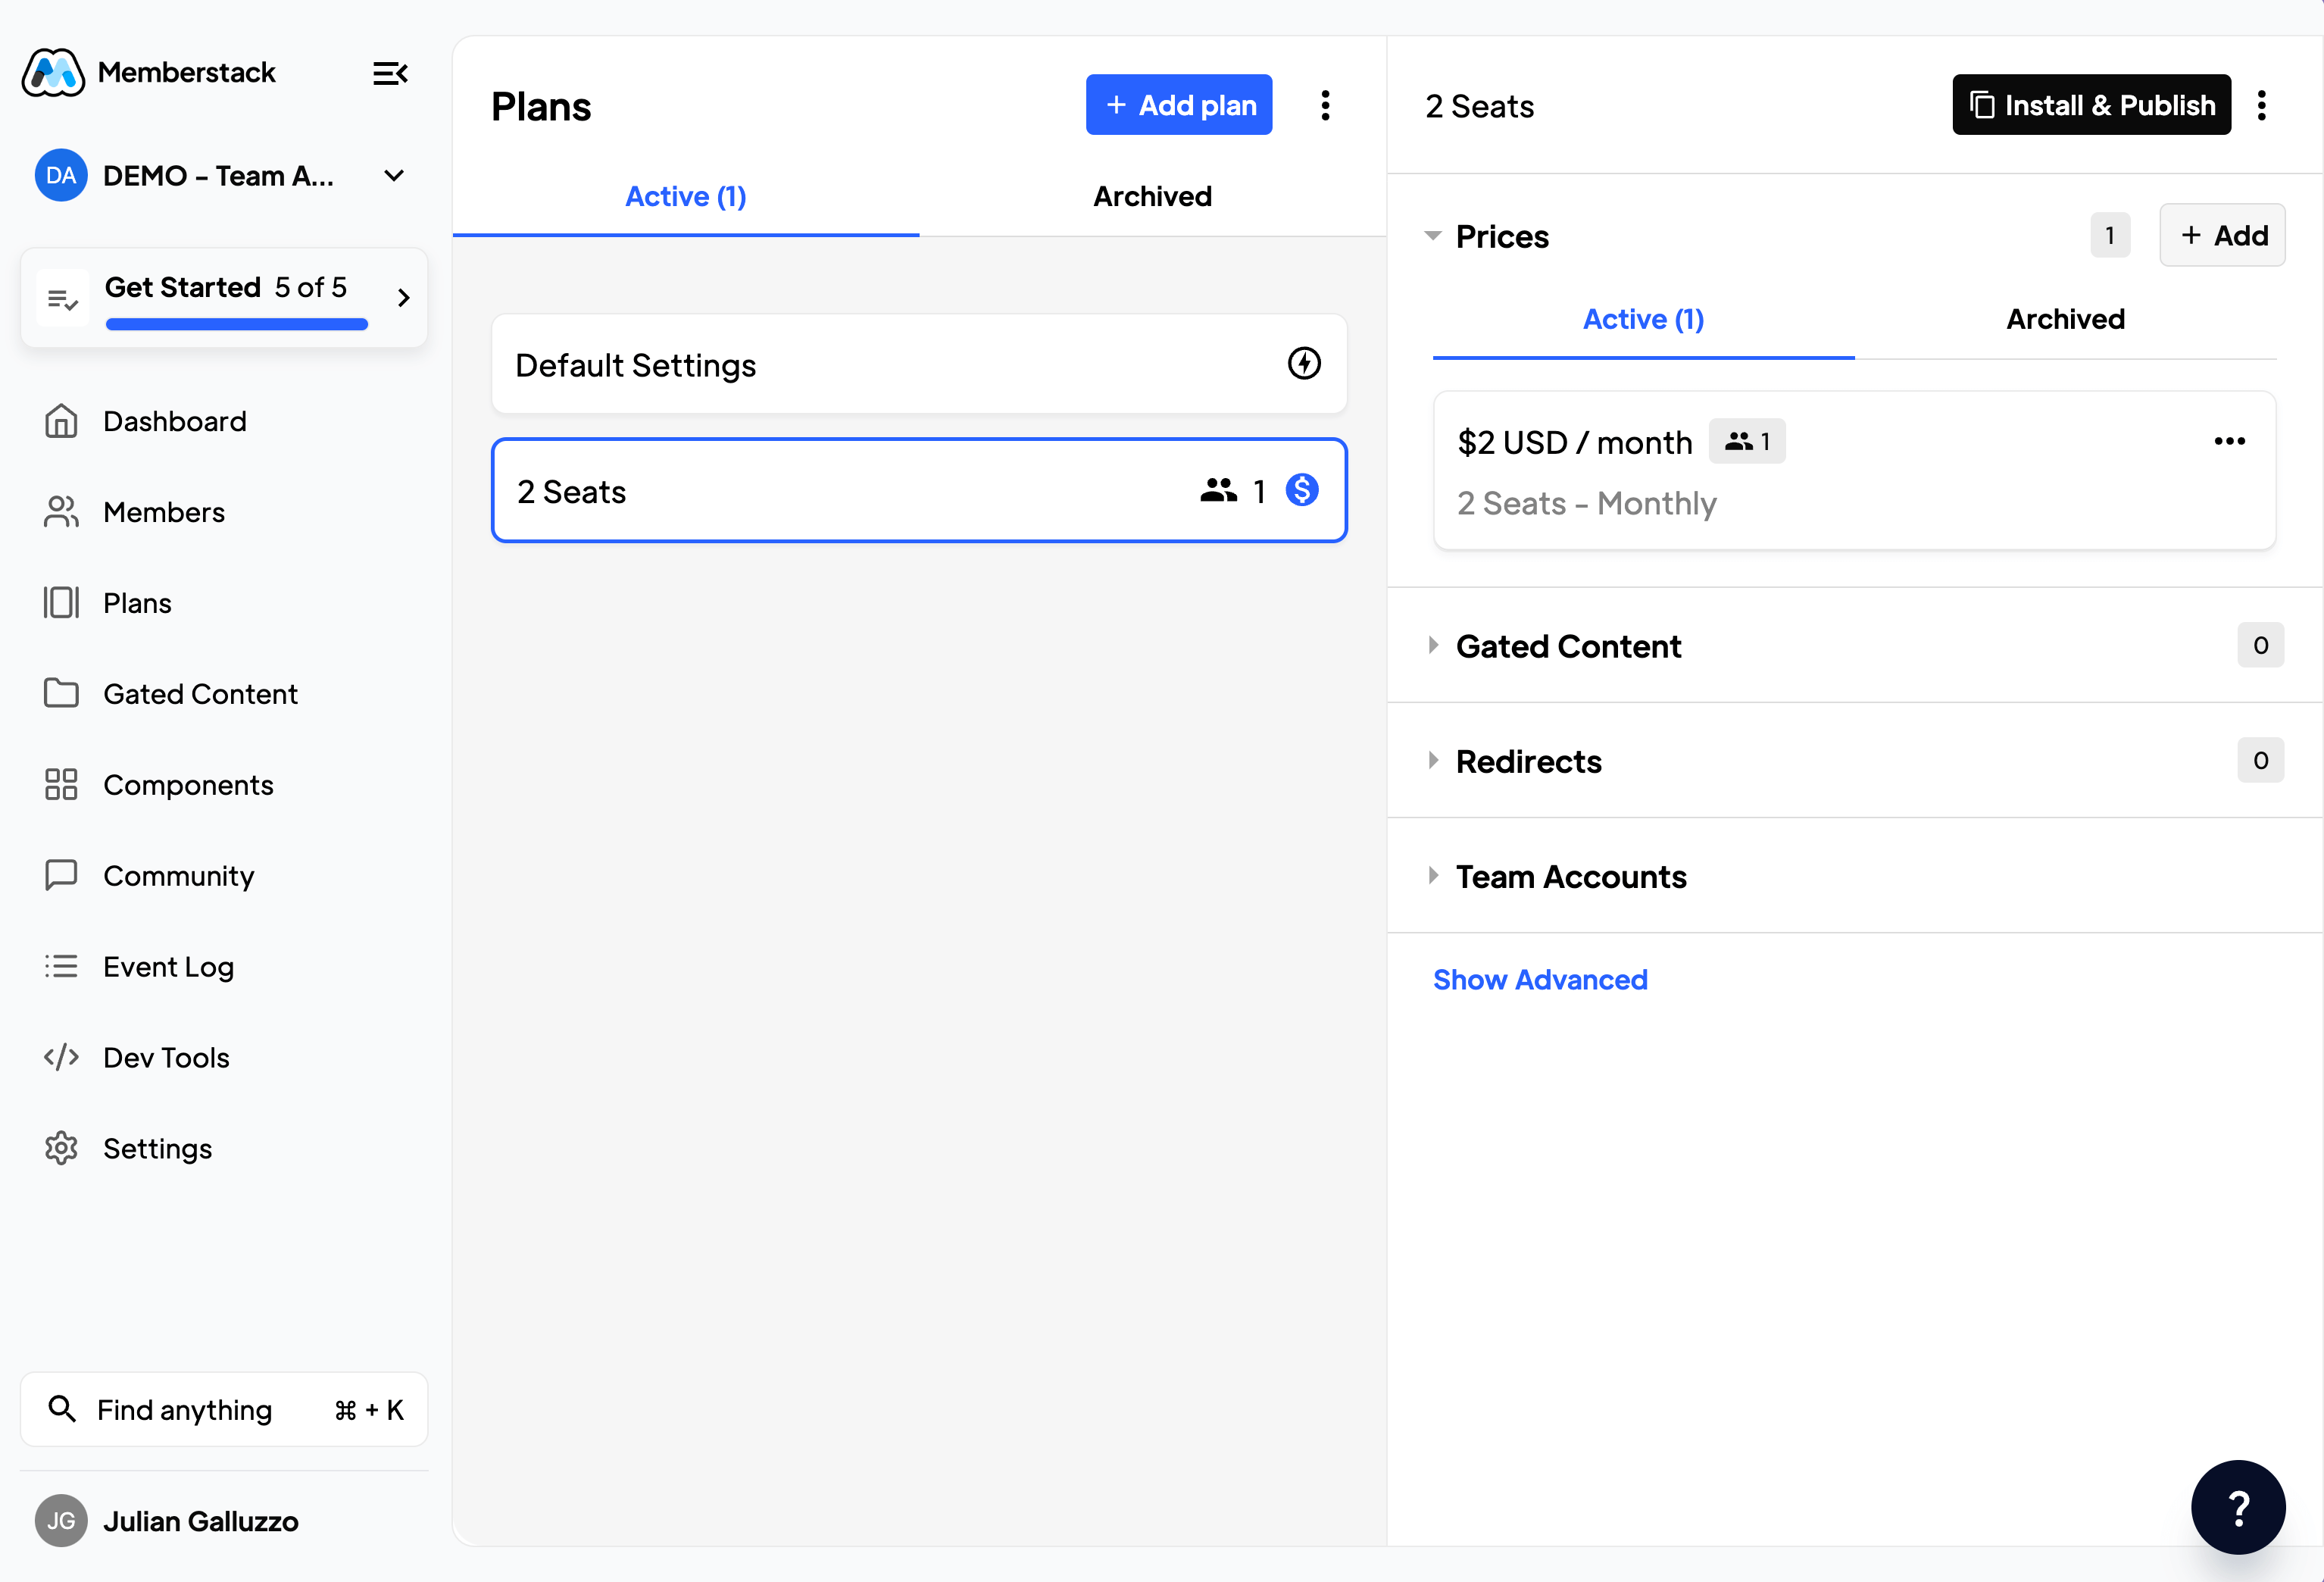
Once your plan has been created, you can click “Add” to create a price.
After you click “Add”, you’ll see this screen - here, you can choose whether you want the plan to be a one-time payment, or recurring. If you choose recurring, you can choose how often you want customers to be re-billed.
👀 You can create multiple prices for the same plan - but, the Maximum number of seats must be the same for all. This way, you can create different prices for options like monthly, yearly, and one-time billing.
⚠️ The Maximum number of seats includes the plan owner - so, if you write 2, they will be able to add one additional team member.

Step 2: Installing your plan
Once you’ve created your price(s), click the “Install & publish” button for your plan. Once you do, you’ll see this popup which has the attributes you need, plus a handy video showing you exactly how to install plans in detail.
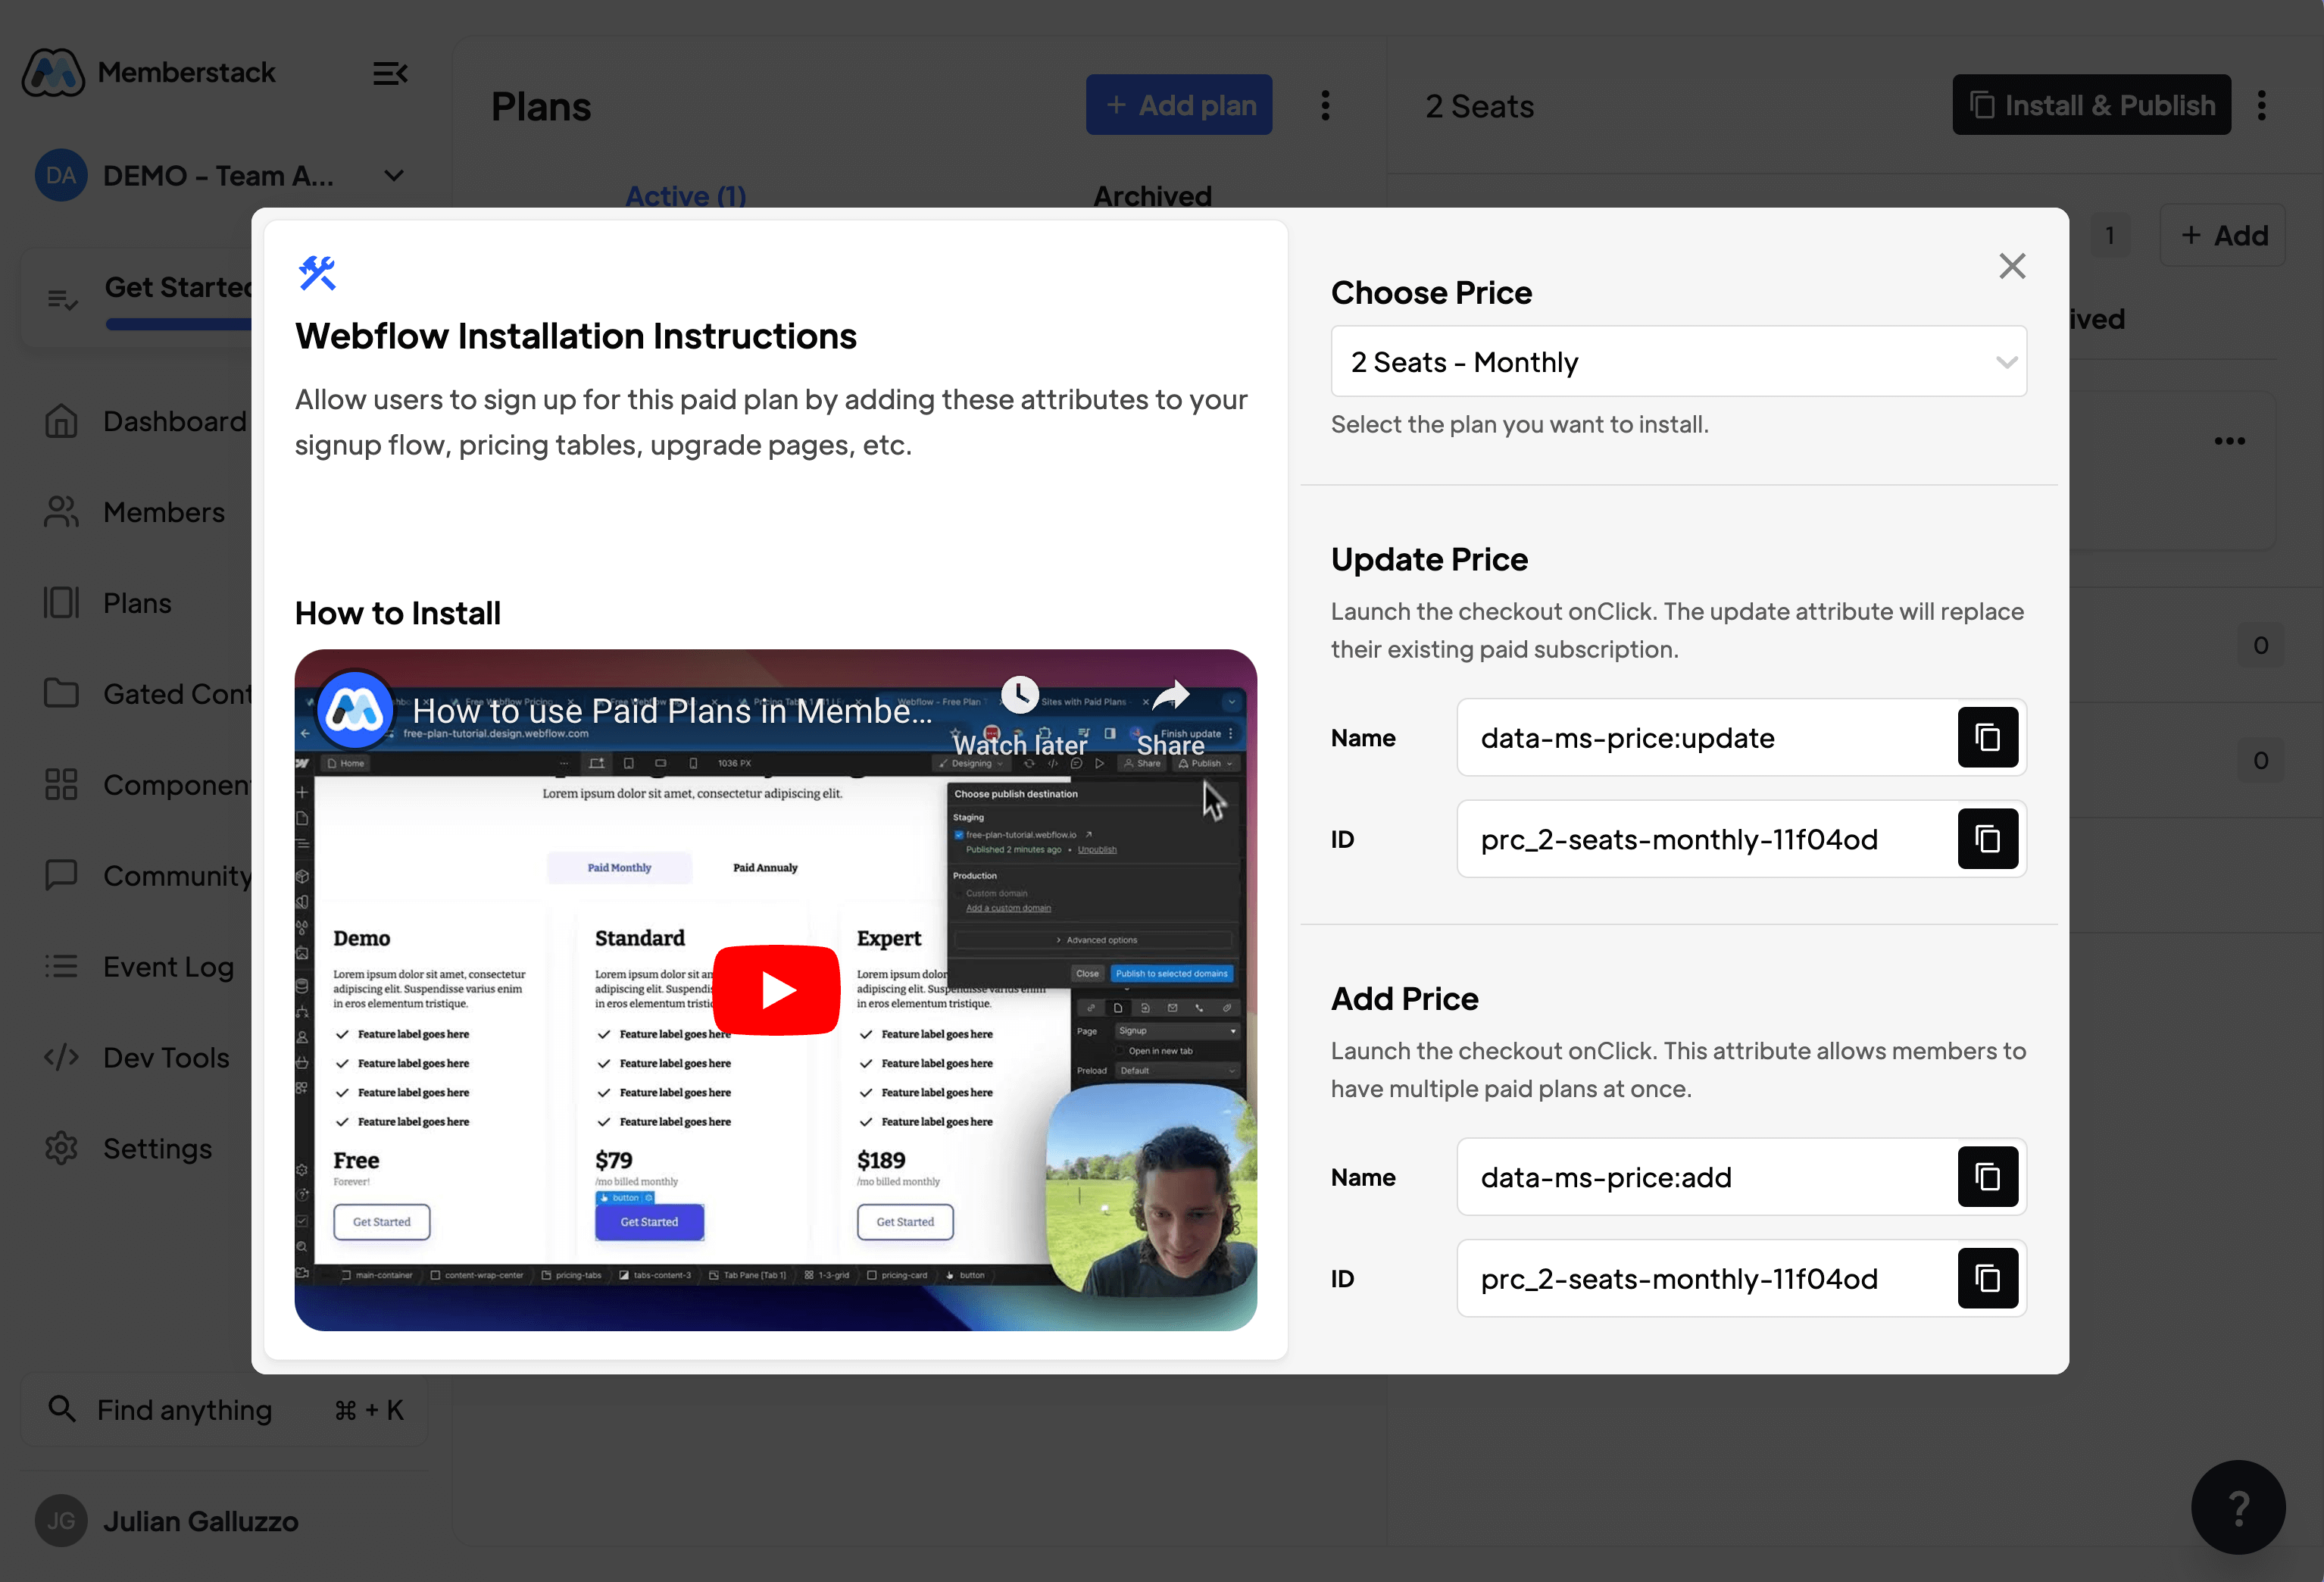
Once you’re done doing this, repeat the process for every new plan you want to make - and don’t forget, a new plan is needed for each new number of seats (for example, “Premium 2 Seats, Premium 3 Seats, and Premium 5 Seats).
How it works
For plan owners
Once you have a customer who has paid for a team plan, everything is managed through the profile modal.
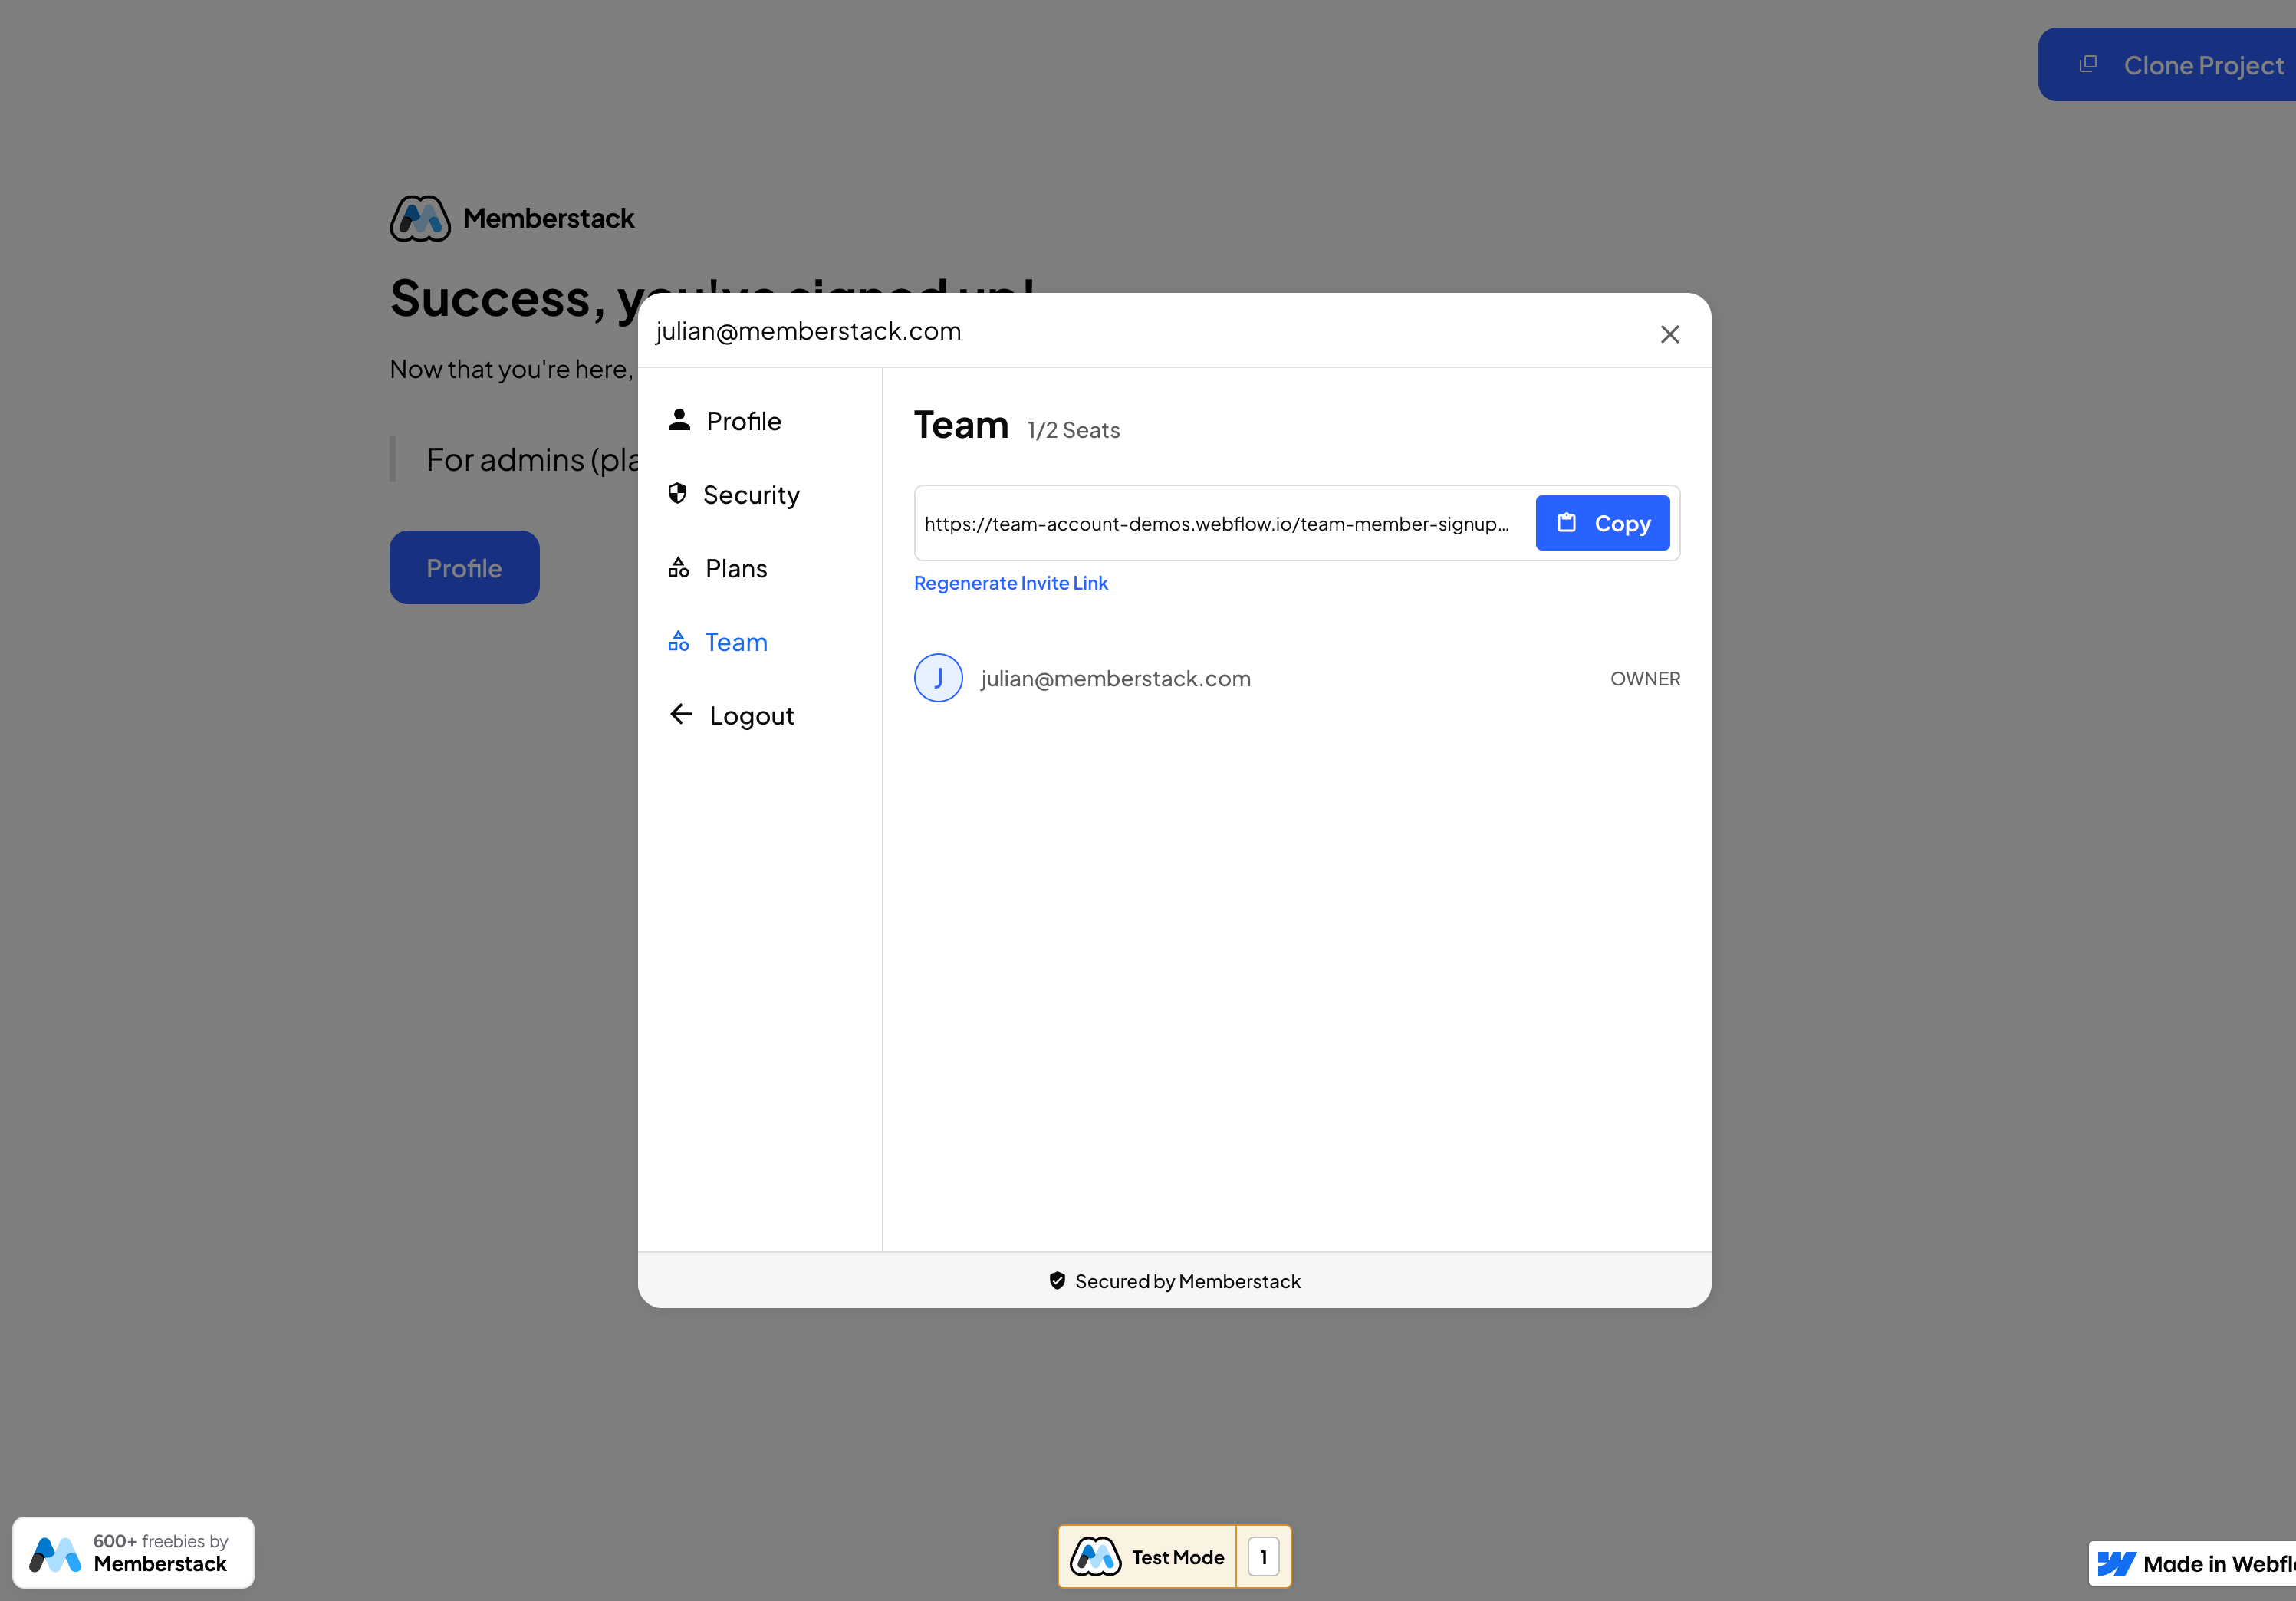
Once they open their profile modal, they will see a “Team” tab. This tab shows the invite link, along with a list of team members.
⚠️ To invite team members, the owner must send them the invite link. If they already have an account, they will be added to the plan when they click the link. If they don’t have an account yet, they will need to create one, and then it will add them to the plan.
Inviting team members
To invite team members, plan owners must open the profile modal to copy the invite link.
When the invited member clicks on the link, one of 2 things will happen;
If member is already logged in: An alert box will pop up to let them know they have been added to the team.
If the member is not logged in: If they log in or sign up on this page, their new account will be added to the team upon creation.
Managing team members
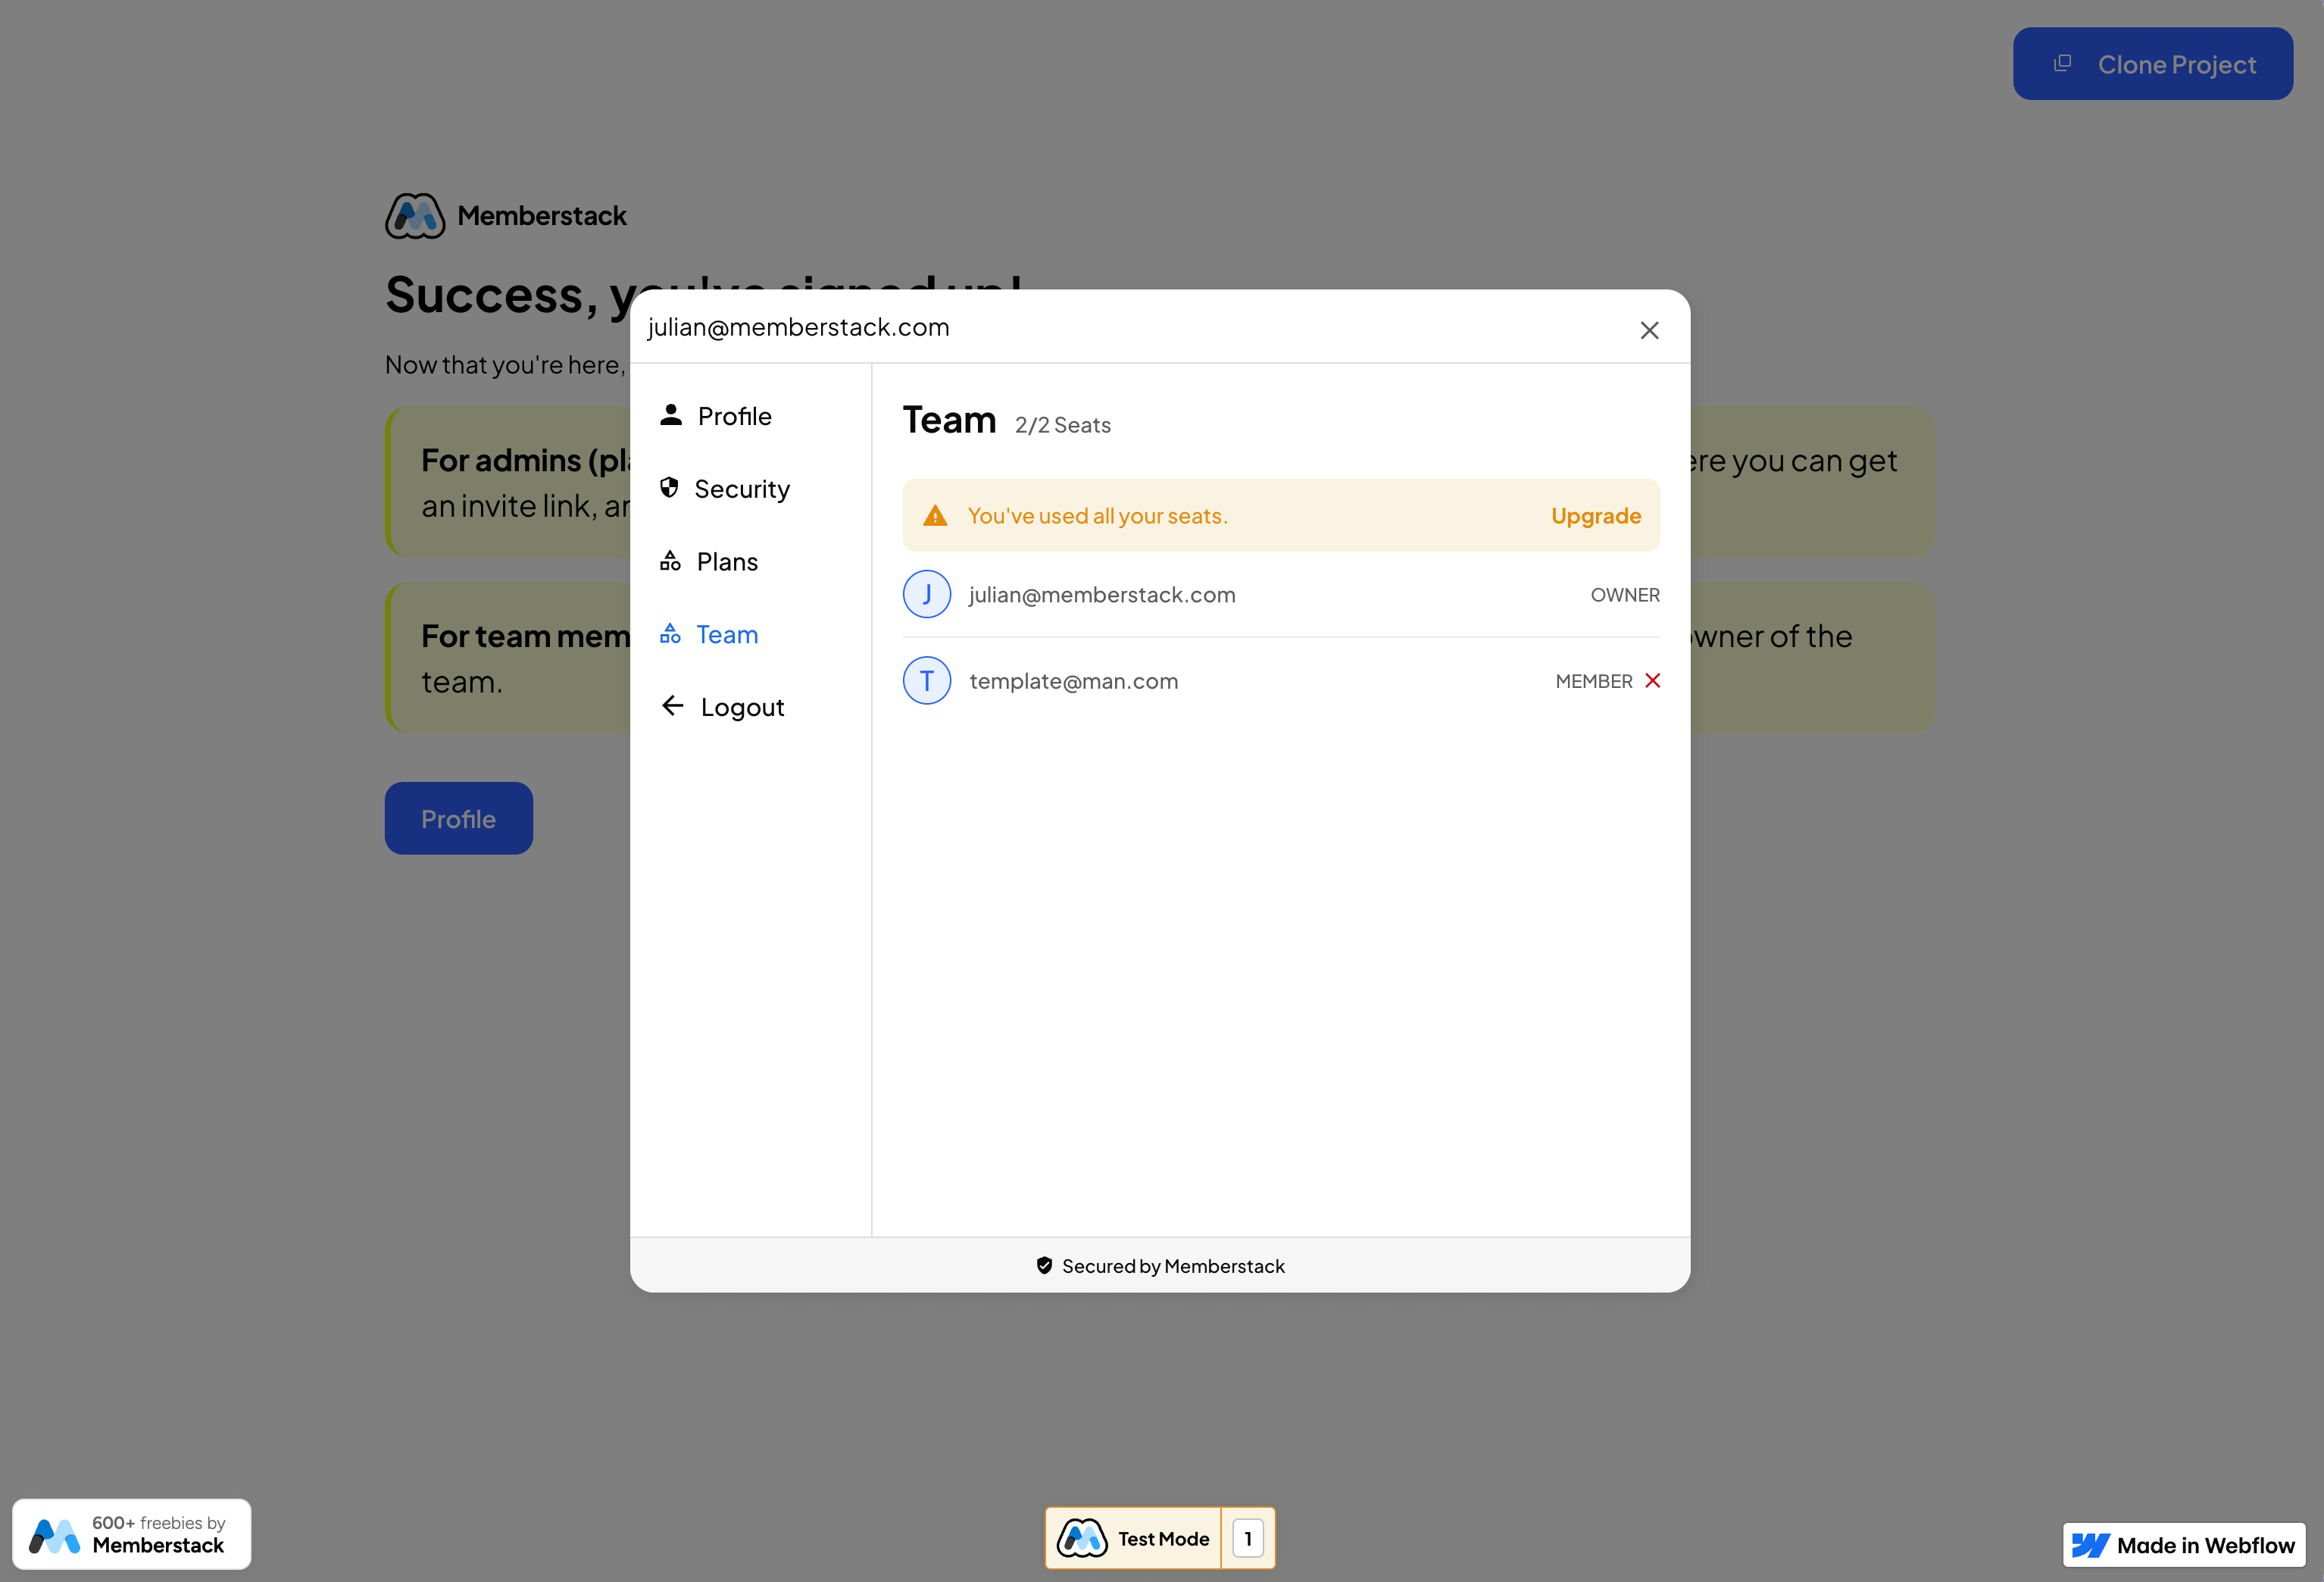
In the “Team” tab of the profile modal, plan owners can view and remove their team members. Along with that, if all seats have been used, they can click to go to the upgrade page.
Want to learn more about Memberstack? Join our 5,500+ member Slack community!
Join the Memberstack community Slack and ask away! Expect a prompt reply from a team member, a Memberstack expert, or a fellow community member.
Join our SlackSimilar Features
Abandoned Cart Emails
Send abandoned Cart / Checkout emails to help you increase conversion rates!
Learn moreMultiple Memberships
Let your members Signup to Multiple Memberships at the same time - members can have access to Free and Paid or Free and Free or Paid and Paid at the same time!
Learn moreWelcome Emails
Automate the process of reaching out to new members and establish a connection with them immediately - at no additional cost.
Learn moreMember Metrics
Keep track of total members, sign ups, active subscriptions, one time plans, trialing members, paying members, and more from a central dashboard.
Learn moreLogin As Member
Help any member through a specific problem without needing to record a step-by-step videos or type up a long email.
Learn moreView All Features →
Start building your dreams
Memberstack is 100% free until you're ready to launch - so, what are you waiting for? Create your first app and start building today.

.png)
.avif)


.png)